Catherine L.
Jun 13, 2026
•13 minutes
How to Build a Custom Mechanical Keyboard: A Complete Guide
A step-by-step guide to building a custom keyboard: layouts, mounting, switches, keycaps, tuning, and budget builds, with no soldering required to start.
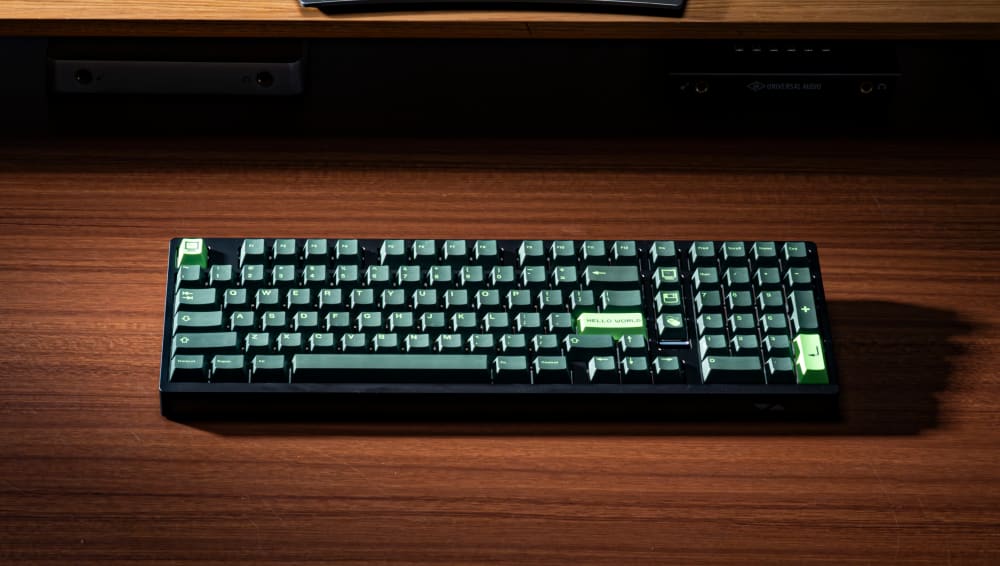
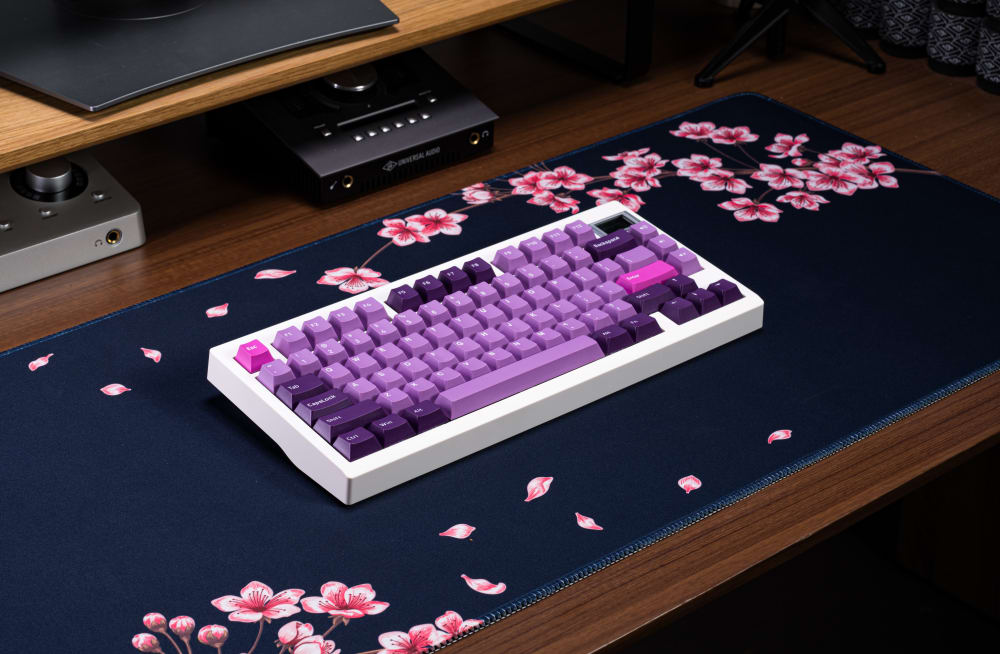
Max102 Mechanical Keyboard on Desk
A custom keyboard is any board you assemble or spec yourself instead of buying it sealed in a box, and the range is wider than most people expect. On one end you drop switches into a hot-swap kit with your bare hands in twenty minutes. On the other end you order a bare PCB, hand-solder 104 switches, and tune the firmware line by line. Both count. The word "custom" doesn't require a soldering iron or a four-figure budget, and that misconception keeps more beginners out of the hobby than anything else.
This guide walks through the actual mechanical decisions that determine how a build feels and sounds: gram-force curves, mounting flex, plate acoustics, RGB direction, and the small tuning mods that separate a hollow plastic board from a quiet, low-pitched one. We'll tie each decision to real, in-stock options across the four common form factors so you can see exactly where each choice lands.
What Exactly Is a Custom Keyboard?
A prebuilt keyboard arrives finished. Switches soldered, keycaps installed, firmware locked. You plug it in and type. A custom mechanical keyboard hands you the decisions instead, and the line between the two falls at one simple point: with a custom board, you choose the switches and keycaps that go into it instead of accepting whatever the manufacturer bundled.
That's the whole definition. Pick your own switches and keycaps and you've built a custom keyboard. Everything else is detail.
From there, custom keyboards split into two types, and the only real difference between them is whether you have to pick up a soldering iron.
The first type is the hot-swap keyboard, often sold as a barebones keyboard kit. You get a case, a PCB, a plate, and stabilizers already installed. The PCB has small metal sockets at each switch position, so you press switches in by hand and they grip without solder. Add the keycaps you chose and you're done. No iron, no flux, no risk of a cold joint killing a key. This is where almost every beginner should start, and it's where you have complete freedom to mix any switches and keycaps you like without committing to anything permanently.
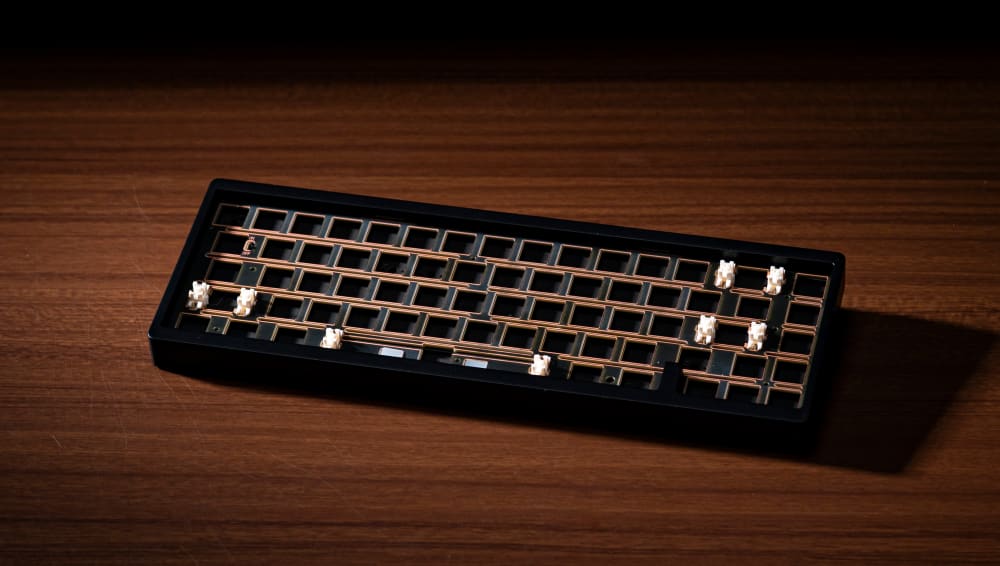
Nut65 Mechanical Keyboard (Barebones)
The second type is the soldered keyboard. The hardware decisions are the same, you still pick the switches and keycaps that suit you, but the PCB has no sockets, so each switch gets soldered into place by hand. That's the only difference. Soldering trades the easy swap for a slightly cleaner, more permanent connection, and it opens up boards that simply aren't sold in hot-swap form. It's more work and a little more risk, but it does not make the board "more custom." A hot-swap build where you chose every part is exactly as custom as a soldered one.
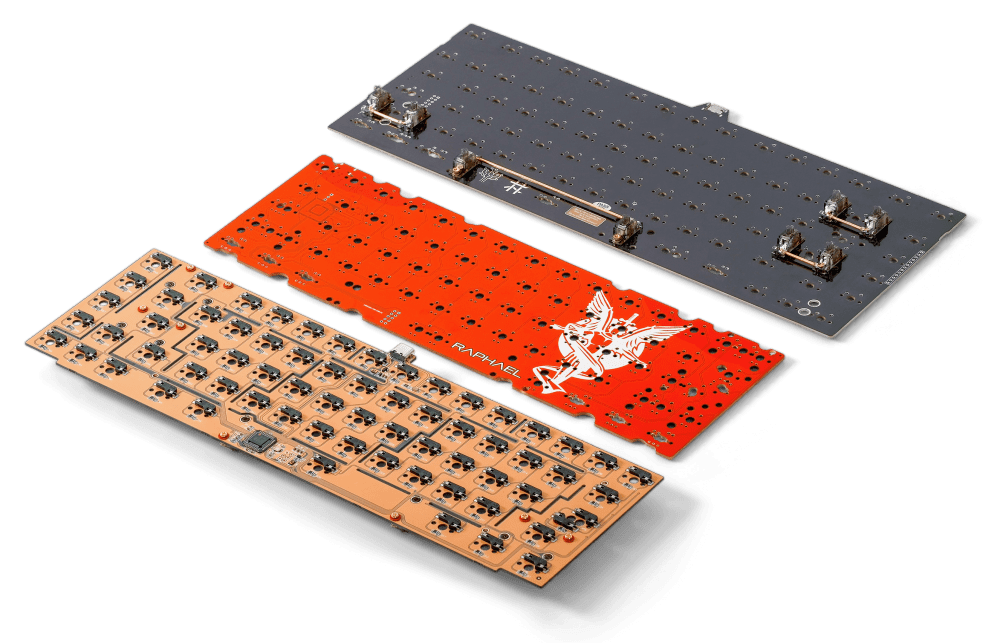
Hotswap vs Soldered PCB
The on-ramp most people take is a hot-swap, gasket-mounted kit. The Kinetic Labs GMK series covers this in four sizes, and every one of them uses MX-style hot-swap sockets, so you build with your hands and not a soldering station. Keep the vocabulary from this section close, because PCB, hot-swap socket, gasket mount, and layout all come back below.
Step 1: Choose Your Layout and Form Factor
Layout is the first real decision, and the usual key-count chart undersells what's actually changing. You're not just losing keys when you go smaller. You're changing how far your right hand travels to the mouse, how much desk you reclaim, and how much you lean on layers to reach what you cut.
Full-size, TKL, 75%, and 65%: what you actually gain and lose
A full-size (100%) board keeps everything: function row, navigation cluster, and a dedicated numpad. The GMK104 is the concrete example here, around 104 keys and sitting near the 1.3 lb end of the range. If you punch numbers all day, the numpad earns its footprint. The cost is desk space and a longer reach to your mouse, since the numpad pushes your right hand out several inches.
GMK104 100% Keyboard
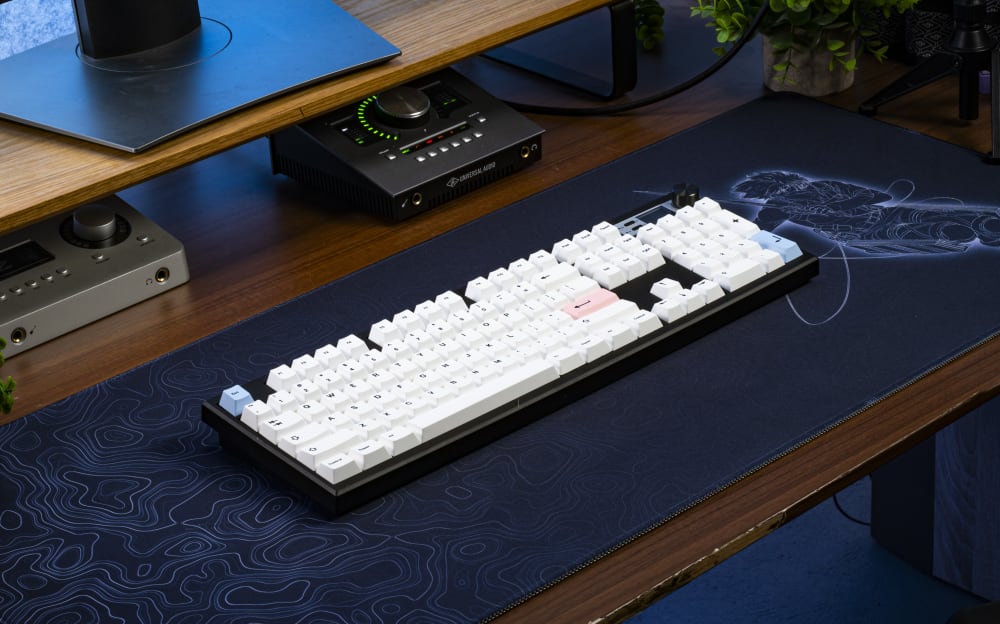
A TKL (80%) drops the numpad and keeps the function row and nav cluster. The GMK87 is the example, and the payoff is ergonomic: your mouse hand sits closer to home, which reduces shoulder rotation over a long day. The Tiger Lite TKL is another 80% option if you want a flex-cut PC plate board in this size.
A 75% squeezes the function row and nav keys into a compact block with almost no dead space. The GMK81 lands here. You keep the F-row you actually use for shortcuts while shedding most of the width, which is why 75% has become the default recommendation for people who want small without retraining their hands.
GMK81 TKL Keyboard
A 65% cuts the function row entirely and keeps arrows plus a few nav keys. The GMK67 is the example, near the 1 lb end and the most portable of the four. These slimmer, small-footprint boards are the easiest to toss in a bag and the kindest to a cramped desk, but the tradeoff is real: F1 through F12 now live on a layer you hold a function key to reach, so there's muscle memory to build before it feels natural.

GMK67 65% Keyboard
Desk space, portability, and muscle memory
Smaller boards travel better and free up mousing room, but every key you remove becomes a key combination. That's the whole equation. A 65% in a bag is a joy. A 65% on your first day of spreadsheet work is a small annoyance until the layers sink in. If a slim, low-travel footprint is your top priority, the 65% and 75% sizes give you the most desk back without dropping to an ortholinear or split board that demands real retraining.
A note on numpad-heavy workflows
If you want a 65% or 75% on your desk most of the time but still hit a numpad for occasional data entry, the Stars21 Numpad solves it. You keep the compact main board for daily typing and slide the numpad in only when the spreadsheet shows up. For more on how these layouts have shifted, our piece on keyboard layout trends goes deeper.

Stars21 Numpad
Step 2: Understand Mounting Styles and How They Shape Sound and Feel
This is the section most storefront pages skip, and it matters more than almost anything except the switches. How the PCB and plate are held inside the case decides how the board flexes and how it sounds.
Gasket mount: what the gaskets actually do
In a gasket mount keyboard, the plate-and-PCB assembly isn't screwed hard into the case. It rests on strips of silicone or poron foam (the gaskets) sandwiched between the plate and the case shell. That assembly floats. When you press a key, the plate gives slightly and the typing vibration is decoupled from the case and the desk underneath it.
Two things follow. The board feels softer and a touch cushioned on each keystroke, which cuts finger fatigue over a long session. And the sound drops lower and rounder, the "thock" people chase, because the energy isn't transmitting straight into a rigid case wall. All four GMK boards ship gasket-mounted, which is unusual at their price. Plenty of boards two and three times the cost still use tray mount.
Tray mount and top mount
A tray mount screws the PCB directly to posts on the case bottom. It's stiff, it's cheap to make, and there's nothing wrong with it if you like a firmer, more uniform bottom-out. Top mount sandwiches the plate between the top and bottom case halves, which is rigid but consistent and is the favorite of a lot of high-end enthusiast boards. Neither floats the way a gasket mount does. The Tiger Lite uses a leaf spring mount, a variation that builds flex into the plate tabs themselves.
Plate material and key return
The plate the switches clip into changes both feel and sound, and the difference is perceptible, not just spec-sheet trivia. Aluminum is the stiffest of the common choices and adds maybe 5 to 10 g of perceived resistance on the return stroke, with a crisper, sharper acoustic. Polycarbonate (PC) flexes more, softens the sound, and feels more forgiving under the finger. FR4 (fiberglass) sits between the two. We dug into this in detail in our plate materials comparison, and the short version is that the plate is one of the easiest ways to nudge a build stiffer or softer without changing switches.

Stiff Brass Keyboard Plate
Step 3: Pick Your Switches
Adjectives are useless here. "Thocky" and "clacky" mean different things to different people, as our own piece on keyboard sound lays out at length. Gram force is the number that actually pins down feel, so anchor your choice there.

HMX Latte Linear Switches on Keyboard
Linear, tactile, and clicky
A linear switch travels straight down with no bump. A 45 gf Cherry MX Red is the reference point: light, smooth, fast. Linears suit quick typists and gamers who bottom out hard and often, because there's no tactile event to type through. For a more modern option, enthusiasts often reach for HMX Latte switches.
A tactile switch has a bump partway down that tells your finger the key has registered before you bottom out. An HMX Frog and Haimu Turtle (silent) are common examples. Touch typists often prefer tactiles because the bump gives feedback you can feel without slamming the key into the plate.
A clicky switch adds an audible click on top of the bump. A 60 gf Box White is the classic. Expect roughly 10 dB more noise than a comparable tactile, which is great for an office of one and rough on everyone else in the room.
Light linears versus heavy tactiles
A light linear in the 35 to 45 gf range floats under fast fingers and is the easy pick for speed and gaming. A heavier tactile in the 55 to 67 gf range resists more and rewards a deliberate, full press, which a lot of writers and coders prefer. Actuation force (where the switch registers) and bottom-out force (where it stops) are two different numbers, and the gap between them is part of why a 45 gf linear and a 45 gf actuation tactile feel nothing alike.
MX-style sockets and what's excluded
Every GMK board uses MX-style hot-swap sockets. That covers the enormous majority of switches sold today. It does not cover Hall Effect (HE) switches or optical switches, which use entirely different stems and signal paths. Dropping an HE or optical switch into an MX hot-swap socket won't work, and this is one of the most common buyer mistakes we see. Before you commit to 65 to 100 of anything, get a switch tester and feel the actuation weight in person. If you're curious how all these switches come together in the first place, our breakdown of how custom switches get made is worth a read.
Step 4: Select Keycaps (Profile, Material, and Legends)
Any MX-stem keycap fits any GMK board, so you've got full freedom here. That freedom comes with a few compatibility realities that decide whether a set looks and sounds the way you hoped.
Profiles compared
Profile is the shape and height of the cap. Cherry is low, around 9 mm at the home row, with a gentle sculpt that most people find comfortable out of the box. OEM is slightly taller than Cherry. SA is tall and rounded, roughly 16 mm at the home row, deep-sounding and striking but tall enough that some typists find the angle fatiguing. DSA and XDA are uniform-height flat profiles with no row sculpting, which some people love and others need time to adapt to. That 7 mm difference between Cherry and SA changes your wrist angle more than it sounds like it would.
ABS versus PBT
PBT resists shine, holds a slightly grittier texture, and tends to sound a touch deeper. ABS is smoother, develops a glossy patina at the high-traffic keys over months of use, and transmits RGB a little better because the plastic is less dense. A set of Chalk PBT is a clean, durable starting point if you want a classic look that won't shine up.
North-facing versus south-facing RGB
This one trips people up. The LED on a PCB can face toward the top of the keycap (north) or the bottom (south). All GMK boards are south-facing, which sends light toward the front of the cap. South-facing avoids the interference problem where north-facing LEDs collide with the cross stem inside Cherry-profile caps. The practical effect for keycaps: tall profiles like SA and MT3 can block south-facing light, so shine-through legends work best in low- to mid-profile caps like Cherry, OEM, and DSA. If you want your legends lit, keep the caps short.
Compatibility checklist
Confirm the stem is MX, confirm the set covers your layout (a 65% needs the right bottom-row and modifier sizes), and confirm there are enough 1.25u, 1.5u, and 2u keys plus the stabilizer-mounted keys your board uses. A gorgeous set that's missing your specific bottom row will leave you staring at blank positions.
Step 5: Tune Your Build (Lubing, Filming, and Foam)
This is where a barebones kit goes from fine to genuinely good, and no storefront page covers it.
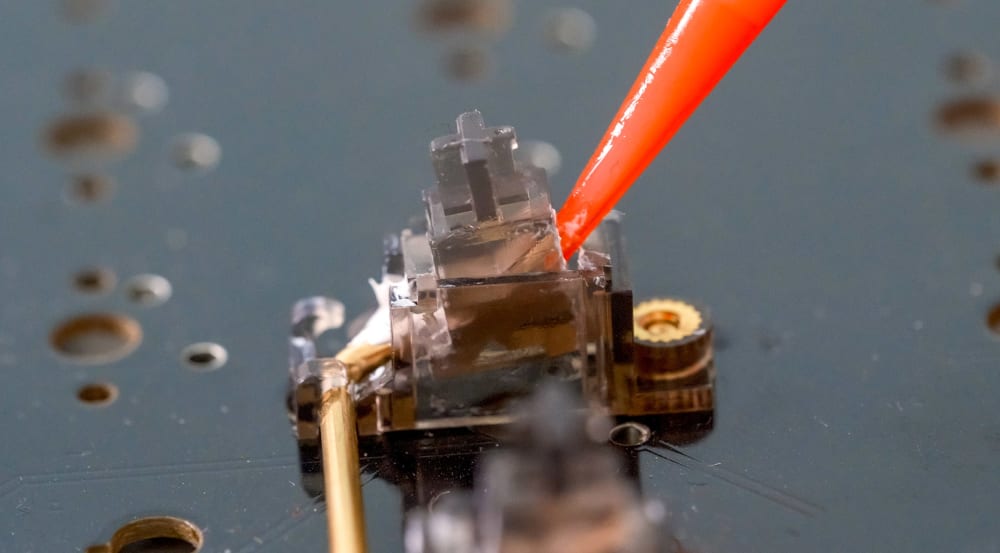
Lubing switches
For linears, a thin PTFE oil like Krytox 105 on the spring kills ping, and a thicker grease like Krytox 205g0 on the rails and stem legs smooths the travel. For tactiles, lube the rails and the spring but leave the tactile legs alone. Grease on the legs rounds off the bump you bought the switch for. We cover this tier by tier in our switch modding guide if you want the full method.
Stabilizer prep
Stabilizers are the wire-and-housing assemblies under your spacebar, Enter, Shift, and Backspace. They rattle when dry. Clip the feet, lube the housings, and dab a thick dielectric grease on the wire ends where they pivot. Boards that ship with pre-lubed, pre-installed stabs save you time, but a light re-lube of the wire still kills residual rattle that the factory pass leaves behind.
Lubing Stabilizers
Case and PCB foam
Foam is the single easiest acoustic mod on a barebones kit. A layer of case foam under the PCB cuts the hollow resonance of a plastic shell by a perceptible 3 to 5 dB, and PCB foam between the board and plate tightens the sound further. Most GMK kits already include foam, so this is often a check-the-box step rather than a purchase. For a deeper quieting project, our silent build guide goes further.
Custom Keyboard Builds for Every Budget
You can put together a real gasket-mount build for less than most prebuilts cost.
Under $100
Start with a GMK67 at $64.99. Add budget linears for around $40 and a set of PBT keycaps for around $80. That's a wireless, gasket-mounted custom keyboard build with hot-swap sockets and no soldering for roughly $150-$200 all in. Every part is replaceable later, which is the whole point of going custom.
The wireless upgrade
The GMK boards run tri-mode: Bluetooth, 2.4 GHz, and wired USB-C. The GMK81 and GMK87 add an LCD screen and a rotary knob for media and macros while keeping the board itself under $70. A 2.4 GHz dongle gives lower latency than Bluetooth if you game; Bluetooth wins for desk clutter and pairing multiple devices.
When to level up
If you find yourself wanting a heavier plate, a different mounting style, or QMK/VIA firmware your kit doesn't support, that's the signal you've outgrown the entry tier. The Max102 and the Lucky65 V3 are aluminum, QMK/VIA-ready steps up when that day comes. Our build ideas for every budget post has more worked examples across price points.
Accessories worth budgeting for
A finished board still leaves room for a few extras that earn their keep. A switch tester pays for itself by saving you from buying 100 switches you end up disliking. A small toolkit (keycap and switch pullers, usually bundled with the kit) makes swaps painless. A coiled USB-C cable, a wrist rest sized to your form factor, and a desk mat that doubles as sound dampening round out a setup without much spend. Pick accessories that match the board you actually built rather than buying a drawer full of parts you never reach for.

Alberta Ice Desk Mat
Software, Lighting, and Programmability
Be honest about the software story, because the marketing usually isn't.
Remapping keys
Every GMK board types plug-and-play on Windows, macOS, and Linux with no software at all. Full key remapping and RGB customization, though, run through Windows software. Mappings save to onboard memory, so once you set a layout it travels with the board to any computer. The Stars21 Numpad uses the same Windows app for macro programming.
Per-key RGB
The south-facing per-key LEDs give you the usual effect library and per-key color control through the software. The light throws toward the front of each cap, which, again, is why low-profile caps show legends best.
The programmable LCD screen
The LCD on the GMK81, GMK87, and GMK104 is the genuine standout at this price. It shows time, system stats, or a custom image you upload through the software. You set it once and it sticks.
What Builders Actually Say After the First Build
The pattern in customer feedback is consistent enough to be worth flagging. The two things people mention most after their first hot-swap build are how much quieter and lower-pitched a gasket-mounted board sounds next to whatever prebuilt they came from, and how surprised they were that the assembly took twenty minutes rather than an afternoon. The second wave of feedback usually lands a few weeks later: the part they didn't expect to enjoy was swapping switches and keycaps on a whim, since nothing is soldered down.
The honest counterweight, and we'd rather you hear it now, is the layer learning curve on the 65% boards. Reviewers who jumped straight to a 65% for spreadsheet-heavy work tend to note a rough first week before the function layer becomes muscle memory. Almost none of them go back to a bigger board afterward, but that first week is real. Weigh it before you size down.
Frequently Asked Questions About Custom Keyboards
Is building a custom keyboard hard for beginners? No, not if you start with a hot-swap kit. You press switches in by hand, snap on keycaps, and plug it in. There's no soldering and the whole thing takes about twenty minutes. The learning curve is in tuning, not assembly.
How much does a custom keyboard cost? A complete gasket-mount build runs about $150-$200 if you pair a $64.99 barebones board with budget switches and PBT keycaps. From there it scales as far as you want, into aluminum cases, premium switches, and group-buy keycap sets.
What switches should I use for gaming versus typing? For gaming, a light linear in the 35 to 45 gf range is fast and forgiving. For typing, many people prefer a tactile in the 55 to 67 gf range because the bump gives feedback before bottom-out. There's no wrong answer; test on a switch tester first.
Do I need to solder a custom keyboard? Not with a hot-swap kit. The PCB has metal sockets that grip the switch pins, so you build with your hands. Soldering only enters the picture if you choose a soldered (non-hot-swap) PCB. Both kinds are equally custom, since what makes a board custom is choosing your own switches and keycaps.
What is a barebones keyboard kit? It's a keyboard with the case, PCB, plate, and stabilizers assembled, but no switches or keycaps. You supply those two parts to finish the build, which is what makes it a custom keyboard rather than a prebuilt.
Can I use any keycaps on a custom keyboard? Any MX-stem keycap fits, but the set has to cover your specific layout and bottom-row key sizes. On south-facing boards, low- to mid-profile caps show shine-through legends best, since tall profiles can block the light.
What is the best layout for a custom keyboard? 75% is the most common recommendation because it keeps the function row while shedding most of the width. Go 65% for maximum portability, TKL or full-size if you want the nav cluster or numpad.
What is gasket mount and why does it matter? Gasket mount floats the plate and PCB on foam or silicone strips instead of bolting them to the case. It softens each keystroke and lowers the sound profile, which is why all four GMK boards ship with it.