ThereminGoat
Jul 21, 2025
•4 minutes
5 Essential Tips for Lubing Mechanical Keyboard Switches
Learn expert tips for lubing mechanical keyboard switches from proper technique to essential tools. Includes best practices for consistent results from ThereminGoat.
lubing mechanical keyboard switches
Lubing switches is the great equalizer in the mechanical keyboard hobby. Whether you're a beginner or someone who has been in the community for more than a decade, everyone has lubed switches at some point during their journeyand it's a skill that you largely get better at through practice.
(Trust me, I've lubed more than 10,000 Outemu switches just for Gazzew back in the day so I know this from firsthand experience!) However, that's not to say that practice is the only way that you can get better at lubing switches – you can also start out with learning a few tips that most people have to figure out for themselves.
1. Practice lube a few switches before completing the entire batch!
While I can understand that this tip feels really simple and obvious to some of you, you'd be surprised how many times people don't do this and end up unhappy with 70+ switches. The first thing you should do every time you sit down to lube switches is completely lube a couple of them and then reconstruct the parts to test out how they feel before committing to the whole batch.
It doesn't matter if you've lubed switches hundreds of times over, you still should absolutely do this step for a couple of reasons. For one, you probably have gotten a bit rusty since the last time you've lubed switches and regaining that 'feel' for things is really important for your consistently.
Secondly, all switches are a little bit different and thus respond to hand lubing differently. You always want to make sure this specific type, material, and feeling of switch behaves like you want it to instead of assuming it'll necessarily feel the same as another brand of switches you lubed once.
2. Less is More – Both in terms of the amount you apply
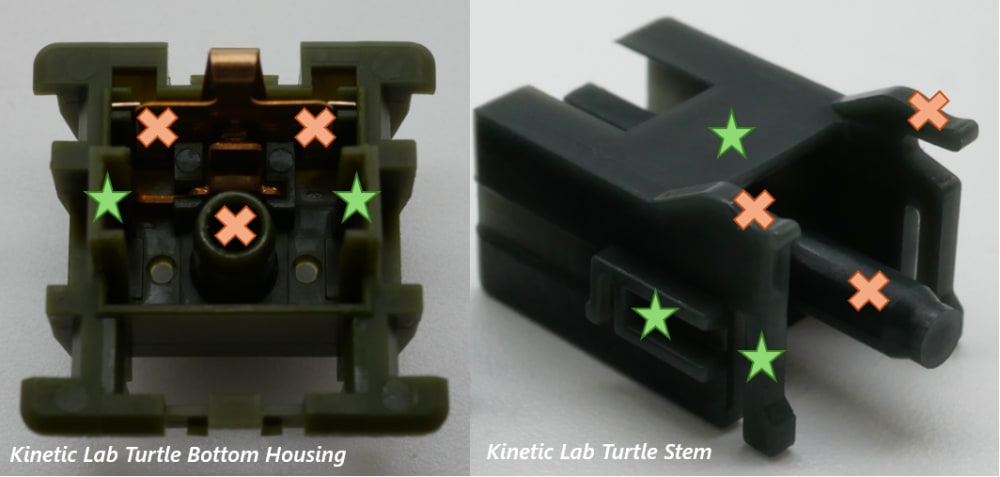
lubing stems and bottom housings.
Hobbyists who are brand new to lubing don't realize that that tiny container of switch lube is actually supposed to last you way longer than just one batch of switches. In addition to only needing to apply a very tiny amount to reduce friction and scratchiness inside of your switches, you really only need to put it on the places where two pieces of plastic are rubbing together – like the slider rails on switch stems and guider rails in the bottom housing.
If you either overlube these areas or coat the entire inside of a switch, it'll come out feeling gummy or squishy. While you should already have the amount of lube you'll need dialed in if you followed the first tip above, you can also consider checking out Adeana's Guide to Using Krytox 205g0 Lubricant here on Kinetic Labs as it is incredibly detailed on where specifically to apply lube. It's definitely one of the better guides I've seen over the years, though I also learned myself from Walker's Keyboard Science many, many years ago.
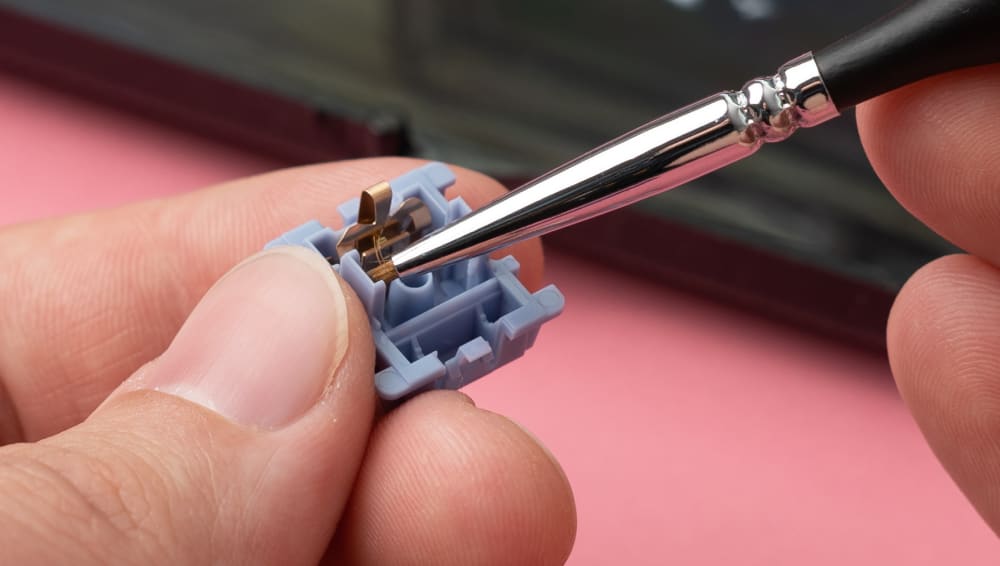
3. Arm yourself with the bare minimum of tools at the least: a switch opener, lube, and a paint brush.
Before you get into your switch lubing journey, make sure that you actually have all the tools on hand that will get you through the process without breaking any fingernails or hurting any teeth. At the extreme minimum, you're going to need a switch opener, keyboard lube from a reputable vendor, and some sort of application device like a brush.
Keyboard Switch Opener
Going in that order, the switch opener is not something to cheap out on as these things last a very long time; I'm still using the very same $12 aluminum switch opener that I've used to open every single switch I've ever had for almost a decade now. As for the lube, please use an approved or recommended brand of keyboard switch lube – stay away from hobby greases, petroleum jellies, or anything else that isn't sold by companies like Kinetic Labs. And finally for the brushes, I personally will swear by using Kinetic Labs' lube brushes and that's not even a paid suggestion either. They've held up great over the years for me and the little finger holds near the top are amazing.
4. Consider getting some organizational tools like lube stations, stem holder, and tweezers.
Once you open up your switches you're going to have at least four piles of parts that are going to get all manner of slippery before they're reassembled again. While you can manage everything in the form of a few piles on your desk, there's a lot of cool stuff out there that can help you organize, store, and stage your various switch parts throughout the lubing process.
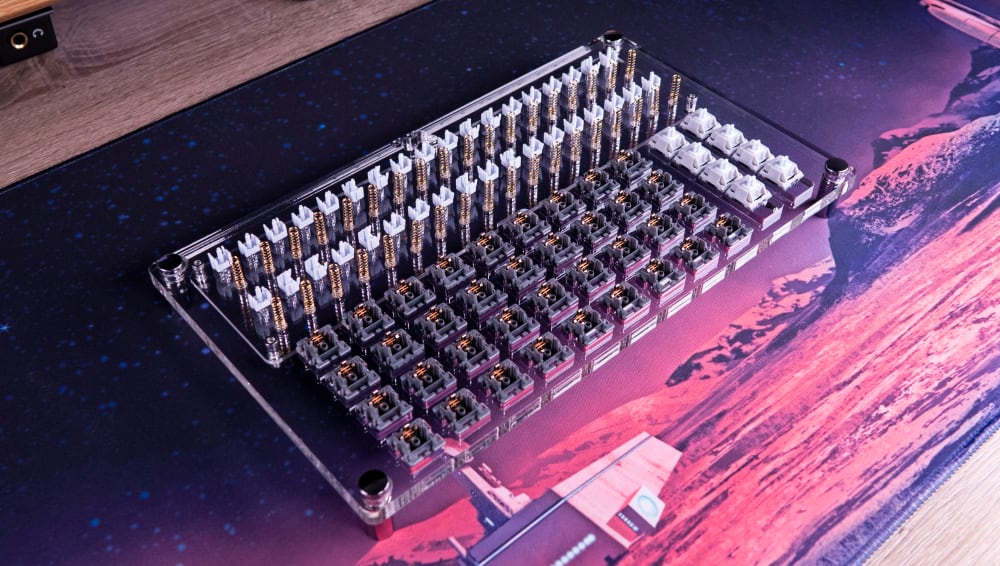
Switch Lube Station
Consider acrylic 'lube station' plates that have specific sections cut out to hold stems, springs, and housings in convenient angles. If you want a little bit less structure but an increased ease of maneuverability, consider a stem holder and a pair of tweezers for picking up, gripping, and twisting stems or springs for factory lube applications to prevent lube from getting all over your fingers (or desk, deskmat, and everything else) in the process.
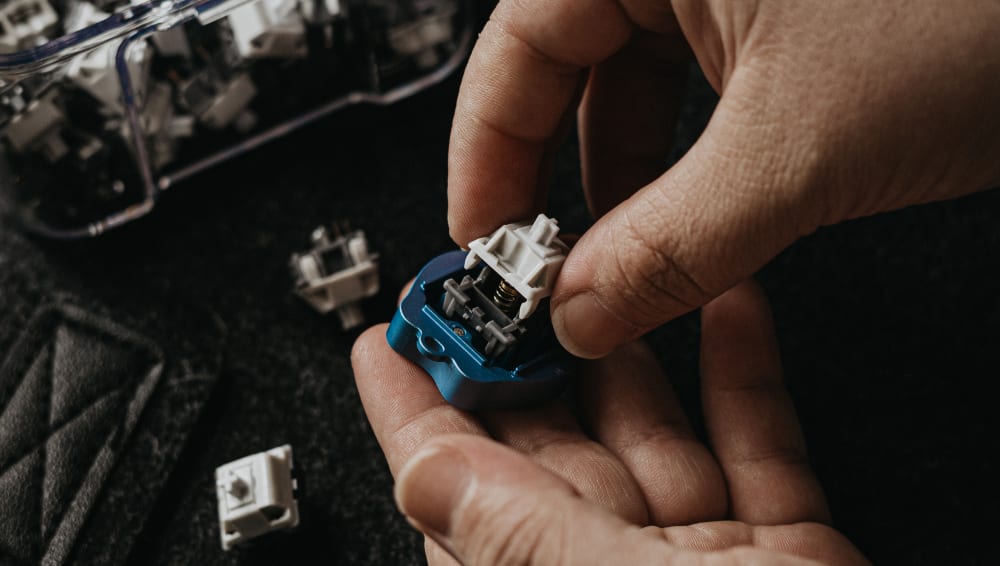
5. Make sure to check your lubed switches before they go into a keyboard!
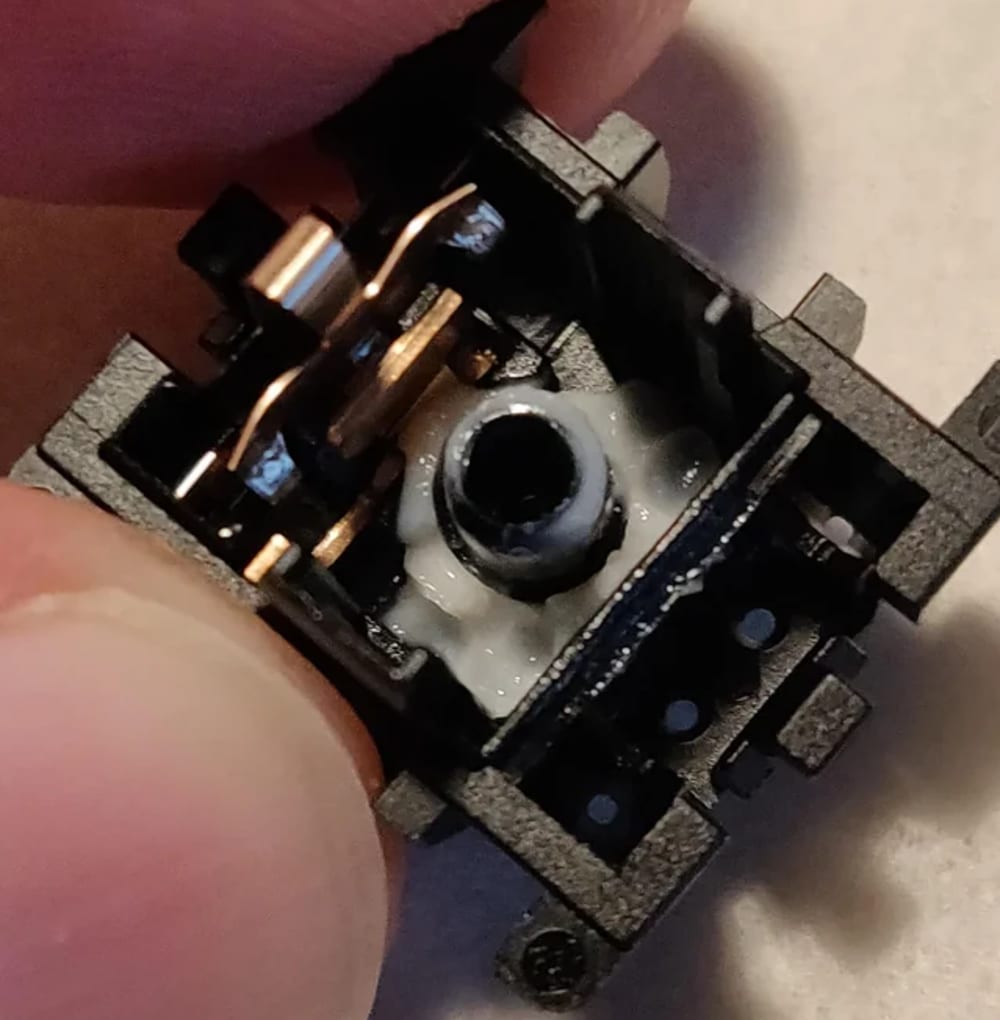
You don't want anything like this ending up in your keyboard!
The final and most important of lubing a batch of switches is to check out how all of them feel before they go into the product. Much like with how checking a few switches before you commit to lubing an entire batch can save you a headache, this can prevent you from realizing that a switch is over or underlubed after it's already soldered into your keyboard.
This step is also additionally important as it gives you a chance to check if you accidentally damaged any switches when recombining their parts together. Even I have accidentally crunched some springs or bent some leaves in switches during putting the parts back together and I'd have never known if I didn't check them before using them.
While this is by no means an exhaustive list of all of the tips and tricks I've learned over the years to help with lubing switches, I can attest that these are the five most important pieces of advice that lubers of any experience level need to know. Consider also doing some other reading on switch lubing or just switches in general before diving into further modifications as you'd be surprised how much overlapping knowledge there is in these articles. I'd recommend Adeana's article I mentioned above though if you want to read some more stuff in my style, consider "Tools to Mod Your Mechanical Keyboard Switches" or "Keyboard Switch Testers Are Underrated".