Adeana
May 22, 2022
•10 minutes
Durock Stabilizers and How to Use Them
The latest and greatest iteration of Durock v2 stabs provides a more quiet and smooth experience
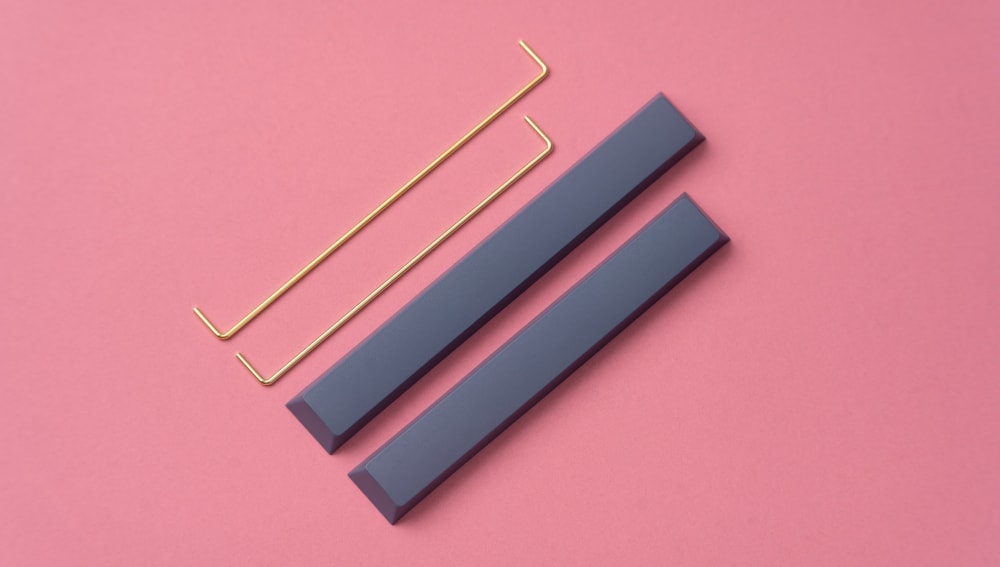

Durock v2 stabilizers and keycaps next to spacebars
If you ask any of the mechanical keyboard builders in the industry, enthusiasts and specialists alike, one of the most important—if not the most important—modification you can do to your mechanical keyboard is the use of well tuned and lubricated, quality stabilizers.
Why, you ask? Because there’s nothing more irritating than stock, dry, rattly, and pingy stabilizers. Good stabilizers will make or break your mechanical keyboard, no matter the price. Even the most expensive mechanical keyboard will feel like the worst of experiences without quality, properly tuned and lubed stabilizers.
What are keyboard stabilizers?
Stabilizers of different shapes and forms are installed in all keyboards to level and support the keystrokes of your larger keys like the space bar, the enter key, the backspace key, the left shift key, etc., depending on the shape and size of your keyboard. There are different types of stabilizers:
Costar stabilizers: they’re rather old, and only found in vintage mechanical keyboards or newer, very few in between keyboards that no-one wants you to go all DIY on. Costar stabilizers are hard to handle, tune, and install—rumor has it they rattle worse than a snake.
Optical stabilizers: those stabilizers are everywhere. Or Razer, you will find them in the gaming branch of the PC industry in many of your average big RGB brandname pre-built optical gaming keyboards. If you use optical switches you’re pretty much stuck with them. Tuning these stabilizers is difficult, and they also are notorious for their rattle.
Cherry stabilizers: screw-in, clip-in, plate-mount—they are the most common out there in the world of mechanical keyboards. They’re called Cherry because the shape of the stabilizers stems, like on the Durock V2 stabilizers, are cross-shaped with a notch to match the fittings of Cherry MX style switches.
Here's a picture of a Cherry-style stabilizer, specifically of the V2 Durock Stabilizers:
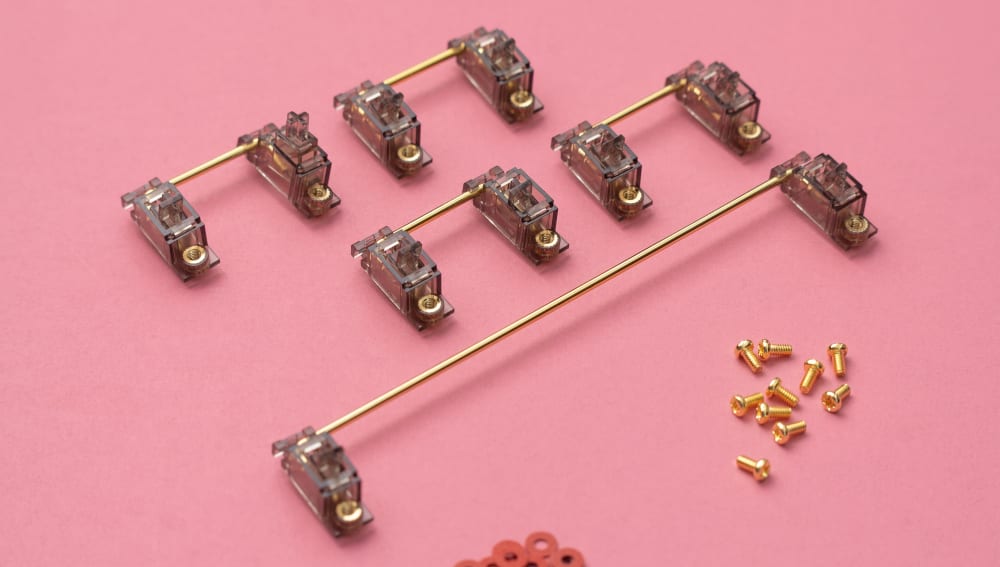

Durock V2 PCB-Mount Screw-In Stabilizers
Durock V2 stabilizers come in two flavors of choice—clear or smokey, and they are what we call screw-in stabilizers. It means these stabilizers can only be installed on a keyboard PCB that has holes for screwing the Durock stabilizers to it.
Stabilizer Housing Materials
Durock V2 stabilizers are made of nylon PA plastic, they are pre-clipped—which you want, and they have gold plated steel threads, screws and wires. They also come with washers that you should always use to avoid electrical shorts. Oh, and make sure to check how many you need and what size space bar you will be using to grab the proper set!
Below is an example of a fully assembled stabilizer:
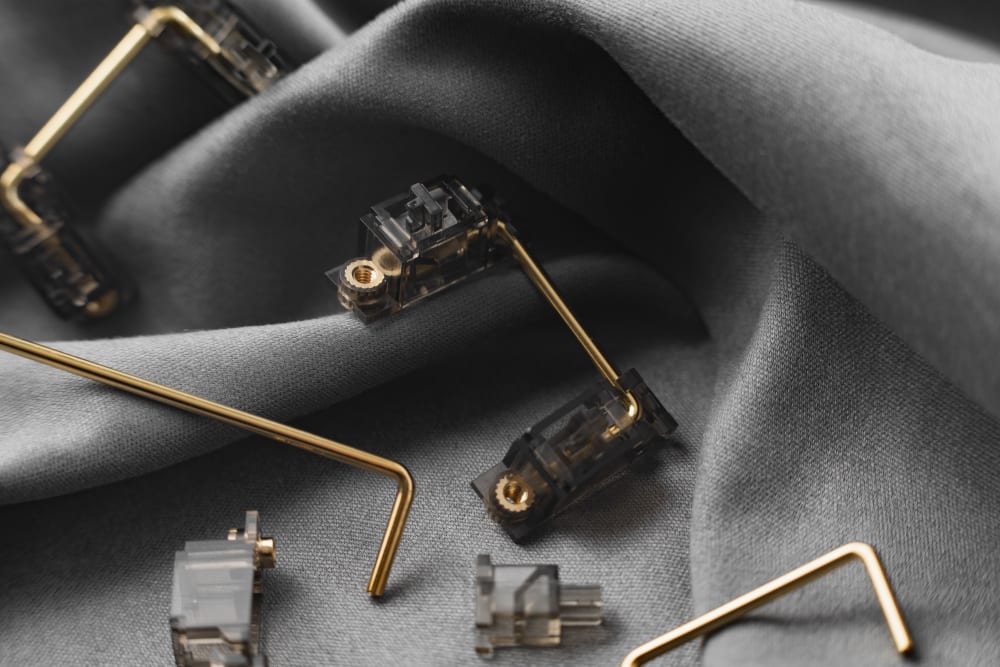

Fully assembled 2u stabilizer
The included screws shown below are placed on the bottom side of the PCB once the stabilizer has been mounted on to the PCB:
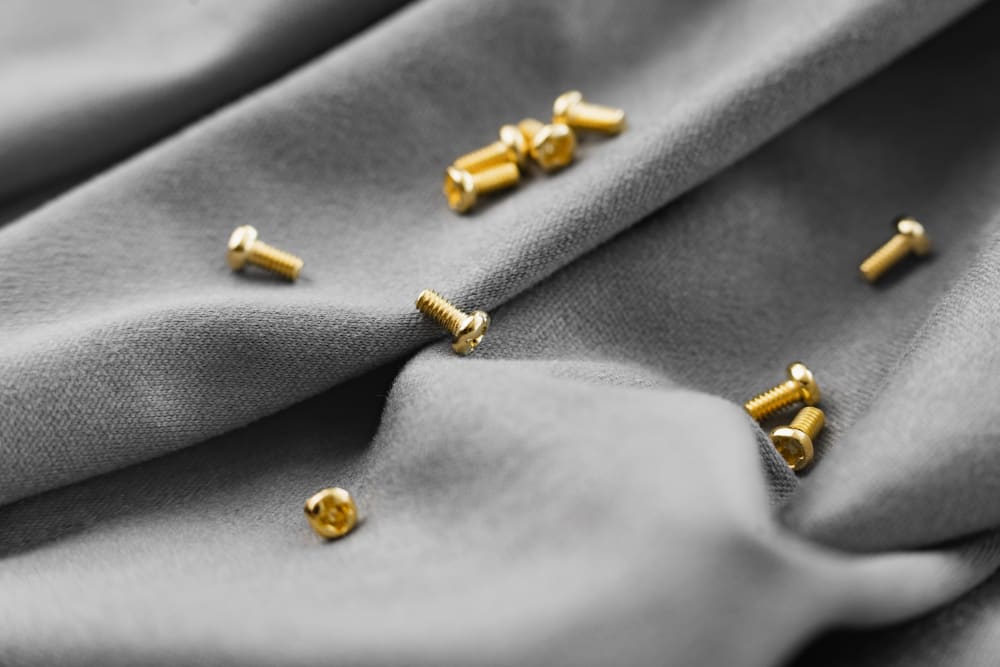

Durock stabilizer gold screws
Between the PCB and the screw, be sure to also place the included washers in your set to be extra sure that there are no circuit shorts (these are included in all packs of V2 Durock Stabilizers):


Stabilizer screw washers
How to lube and mod your stabilizers
When you get your Durock V2 stabilizers, you will want to do a few things before installing them. First, definitely watch this video by Alexotos—it’ll be some of the best 10 minutes you’ve spent to hone your skills as a keyboard builder.
You will want to balance your wires on a flat surface to avoid rattle—try a glass surface, it’s always level! Then you will want to use semi-viscous lubricant like Krytox 205G0 with a brush to lube your Durock stabilizers housings and the sides of the stabilizers stems. After that, apply a decent coating of a thicker lubricant like dielectric grease grade 2, Krytox 205G2 or Krytox HXT-BDZ with a syringe or a thin pointy brush on the bent ends of each Durock V2 wire before assembly. It will ensure that the part of the metal wire touching the nylon plastic of the stem does not make that awful, irritating, shudder-inducing pinging sound!
Tuning your Durock V2 stabilizers is a little bit like cooking—you always want to taste things before you serve them. Here you’ll want to test your stabilizers before you assemble your keyboard, especially if you are soldering your switches to your PCB. If you still hear rattle and/or ping, make sure your Durock V2 wires are properly balanced, that your housings are tightly fastened to your PCB, and then you can add more of the thicker lubricant you used on your wires where they meet plastic.
The thing to remember is to take your time with this step of keyboard building. Tuning and lubing stabilizers is fiddly but provides wonderful results when done well, and you will enjoy your mechanical keyboard that much more! Durock V2 stabilizers are true and tried and an all-time favorite among mechanical keyboards enthusiasts and specialists alike.
When screwing in place your Durock stabilizers to the PCB of your mechanical keyboard: the larger holes are for the plastic tabs of the stabilizers to slot in and the smaller holes are for the threads where you’ll attach washers and screws from the underside of the PCB. Make sure to tighten the screws all the way so your housing cannot wiggle as it’s one of the most common source of stabilizers rattle.
What if my spacebar is still rattly after lubing?
Sometimes, even though we’ve done our best when lubing, tuning, and testing our Durock V2 stabilizers, nothing does it…have a look at your space bar keycap. If your space bar is not flat and level, that is a sure sign of persistent rattle and ping.
Also, you should expect to have to “plug” your Durock stabilizers once in a while after prolonged use of your mechanical keyboard. For ease of access, this is often done with a syringe containing the same lubricant that you used to lube your Durock V2 wires originally. Just use a stem holder—or your fingers—to lift your Durock V2 stems one by one and inject lubricant as needed on either or both sides of the stem where wire meets plastic.
Below is a visual of using Krytox 205g0 to plug an installed Durock stabilizer:
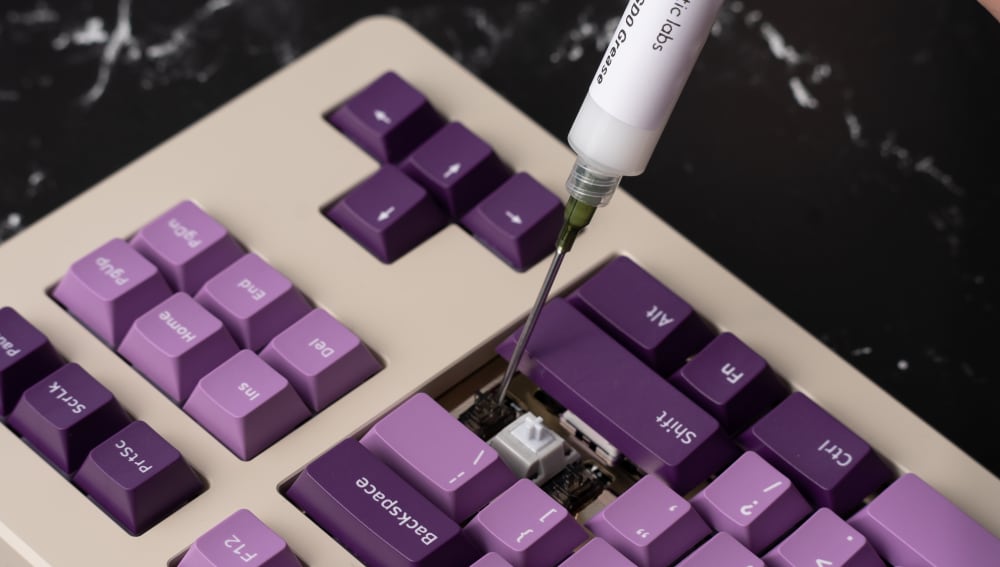

Plugging stabilizers with lube syringe
You can also mod your Durock stabilizers. For more advanced builders—or patient ones—you can try things like the holee mod or the epsi mod to get a different feel and sound from your stabilizers. These mods are not necessary but they can help with the one most dreaded horror of mechanical keyboards: the return of the ping…
PCB Mount Screw-In Stabilizers
If your build supports PCB mount screw-in stabilizers, you should look for "PCB Mount" or "Screw-In" when buying your stabilizers.
Generally, using PCB mount stabilizers could result in more sturdy, stable stabilizers as they screw directly to the PCB. But if you are using a high quality plate, plate mounted stabilizers should work just as well.
You can tell apart screw-in stabs from plate mounted stabs as the screw-ins have inserts for screws in the housings as shown below:
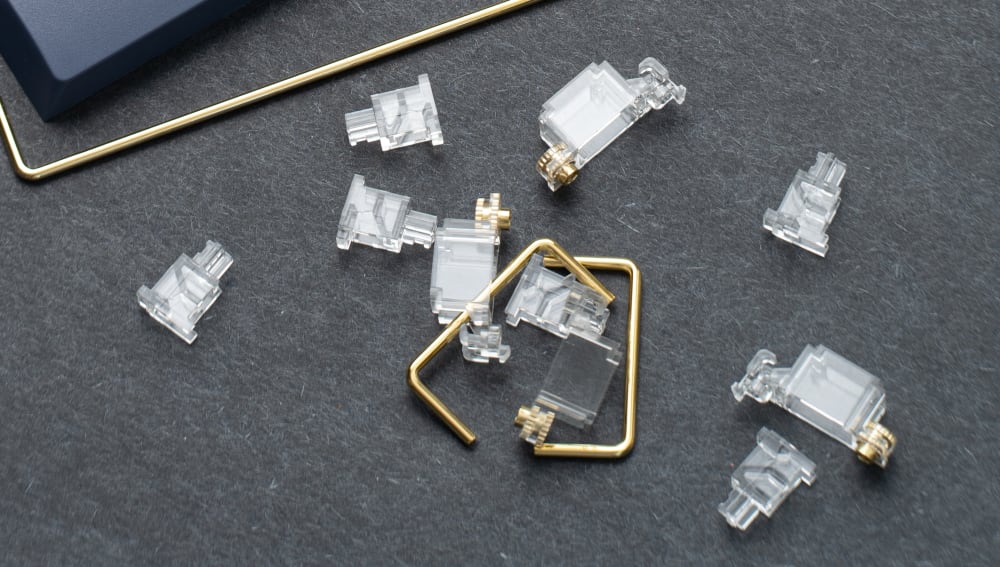

Durock stabilizers housings and wires
Plate Mount Stabilizers
If your build does not support PCB mount stabilizers, you will need to go the route of plate mounted stabilizers, so be on the lookout for listings that mention "Plate Mount" stabilizers.
Despite not being screwed directly to the PCB, plate mounted stabilizers can produce great results, especially when being used in a high quality plate that has tight fit on the stabilizers.
Prevent Wire Popping
Newly introduced in the V2 version of Durock stabilizers, the stabilizer housings contain extended hooks that wrap themselves around the gold wires to help prevent popping.
Wire popping usually happens as you're taking a snugly-fit spacebar keycap off, or when you are tuning your stabilizers while they are installed. Be sure to take keycaps off using a keycap puller, and if tuning stabilizers after they are already installed, be sure to use a lube syringe for easy insertion.
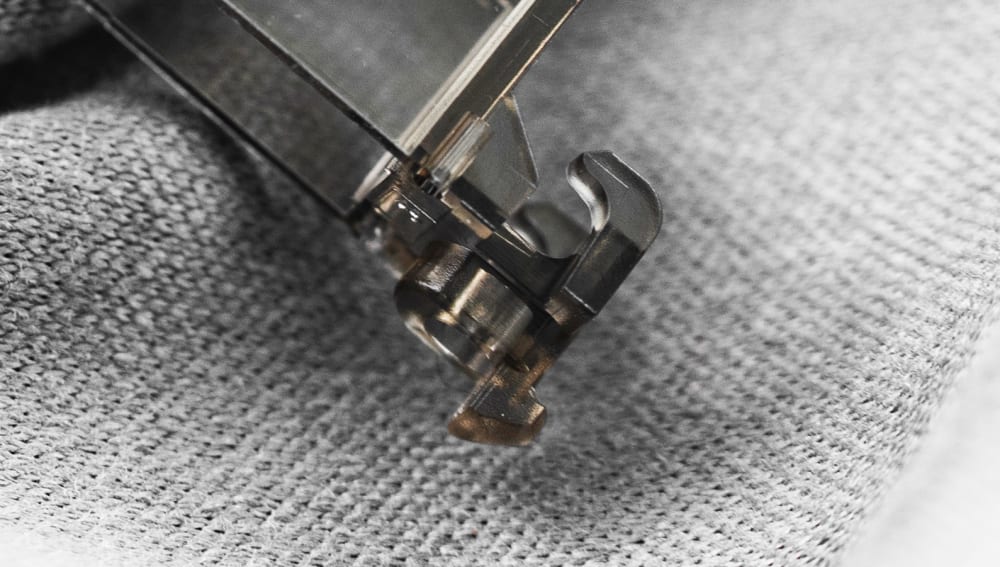

Anti wire popping hooks in Durock stabilizers
Common Questions about Durock Stabilizers
Below are some of the most common questions we've received about Durock stabilizers:
- Are Durock Stabilizers good?
- Yes, Durock stabilizers are considered by many in the mechanical keyboard community to be high quality screw-in stabilizers as well as high quality plate mount stabilizers.
- What are Durock stabilizers?
- Durock stabilizers are available as plate mount stabilizers as well as PCB mount stabilizers
- Are Durock stabilizers Pre-clipped?
- Yes, Durock stabilizers are pre-clipped for the screw in stabilizers as well as the plate mounted stabilizers.
- Are Durock V2 stabilizers plate mount?
- No, Durock V2 stabilizers are PCB mount stabilizers (also known as screw in stabilizers), but Durock does offer plate mounted stabilizers as well.
- Do you need to clip Durock stabs?
- No, both screw-in stabilizers and plate mounted stabilizers by Durock are pre clipped, so there is no clipping necessary.
- What is the difference between Durock V1 and V2 stabs?
- Durock introduced anti wire-popping hooks in their latest V2 version to prevent wire popping (the new design helps avoid wire popping).
- What are Durock stabs?
- Durock stabs are stabilizers for your mechanical keyboard. You use them on longer keys, such as the space bar to stabilize the key and prevent rattle.
- How do you install a Durock stab?
- Installing your stabilizers will depend on whether they are screw in stabilizers (pcb mount stabilizers) or plate mount stabilizers. Screw in stabilizers screw directly into the PCB while plate mounted stabs clip into the keyboard plate.
- Are Durock stabilizers compatible?
- This will depend on whether you need PCB mount screw in stabilizers or plate mounted stabilizers. Check with your keyboard manufacturer to ensure you buy the correct version.
- Do Durock stabilizers come pre lubed?
- No, Durock stabilizers do not come pre lubed and you will need to lube the housing and stem yourself.
- Are Durock stabilizers screw in?
- Yes, Durock stabilizers are offered in screw in (or pcb mount) form so that they can screw directly into your PCB using the provided screws and washers.
- Are screw in stabilizers better?
- For the most part, stabilizers that use screws have a more firm hold on the PCB and may produce less rattle. However if you are using a high quality plate with a snug fit, then plate mounted stabilizers will work just as well.
- Should you lube V2 Durock stabilizers?
- Yes, it is important to lube your stabs to prevent unwanted rattle and noise.