Keybonbon
Nov 15, 2023
•6 minutes
TG67 V3 Mechanical Keyboard Assembly Guide
In this post, we review how to assemble your TG67 V3 mechanical keyboard, configure it with VIA, and debug common issues.
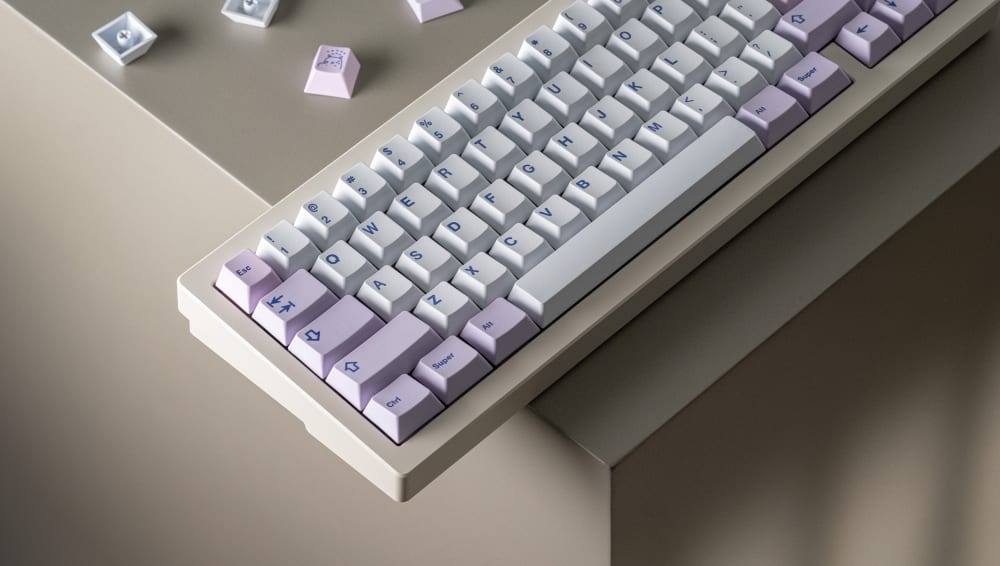
TG67 V3 Mechanical Keyboard Beige on edge
The TG67 V3 is a premium mechanical keyboard that is ready-to-ship, fully aluminum, hand-assembled, and hot-swappable with per-key RGB and a 2-year warranty. In this assembly guide, we go over what's in the box, how to assemble your keyboard and common questions that may come up.
The third iteration of the TG67 mechanical keyboard has several improvements over the previous versions. Here's a quick list of the improvements:
- Pre-assembled: the gaskets, stabilizers, and case are now assembled by hand by us, so all you need to do is add your switches and keycaps, which must be purchased separately.
- Stabilizers: pre-installed Durock V2 screw-in stabilizers, which are the industry standard.
- Stabilizer lube: a syringe of Carbon GS3 stabilizer lube is included with your order, allowing you to tune and silence your stabilizers.
- Carrying case: packaged in a hard carrying case, perfect for storage or travel.
- Switch sample: a 13-pack sample of popular switches is included with your keyboard.
- More colors: 9 color options total, with 5 new colors on top of the previously offered colors. E-white, black, beige e-white, lavender, mocha, baby blue, pink, dark green, and mint.
What's In The Box
The following items are included with your TG67 V3 order:
- Pre-assembled aluminum keyboard case
- Hot-swappable PCB with per-key RGB, configurable through VIA
- Pre-installed gaskets
- Pre-installed Durock V2 Stabilizers
- Pre-installed Polycarbonate Plate
- Pre-installed case foam
- Pre-installed plate foam
- Rubber feet to prevent sliding
- Keycap + switch puller
- Hex screw tool
- USB-C to USB-A cable
- Hard carrying case
- Carbon GS3 Stabilizer Lubricant syringe
- 13-pack sample of Gateron Milky Yellow Pro switches
How to Assemble
The V3 version of the TG67 has been hand-assembled and inspected by us, you'll even get to see who assembled your keyboard with the included postcard!
Switches and keycaps are not included with your keyboard (all switches and keycaps sold by us are compatible), so you'll need to purchase those separately. The TG67 is hot-swappable, so no soldering is required: simply pop in your desired keyboard switches as shown below:
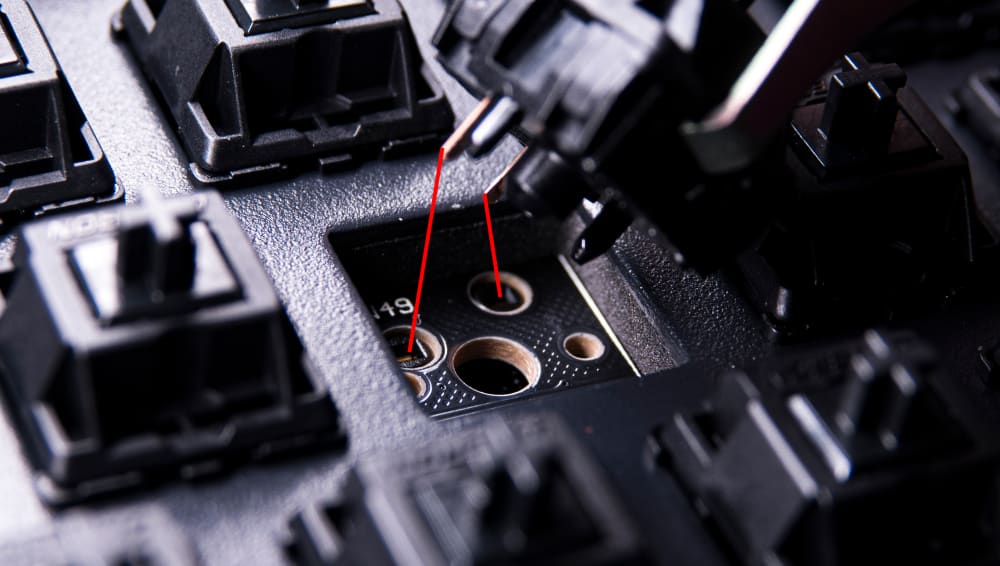
Inserting Keyboard Switch
We recommend using the VIA configurator's Key Tester tab to test that all your keys are working properly after installing them. If you notice a key is not registering correctly, remove the switch, ensure the pins are straight, and try re-inserting the switch.
Everything else besides switches and keycaps is included in your kit, including a 3ft straight cable and tools to screw/unscrew all parts should you want to make advanced modifications.
Lubing Your Stabilizers
Your TG67 V3 includes a syringe of Carbon GS3 stabilizer lube, which was specially formulated to silence stabilizers.
The most important thing to keep in mind when lubing your stabilizers is that less is more, and in general it's easy to add lube, but very difficult to take it away. Applying too much lube will result in sticky stabilizers.
The goal when lubing stabilizers with a syringe is to coat the contact points between the stabilizer's metal wire and its housing. Start by inserting the syringe tip with the included blunt needle into the opening of the stabilizer as shown below:
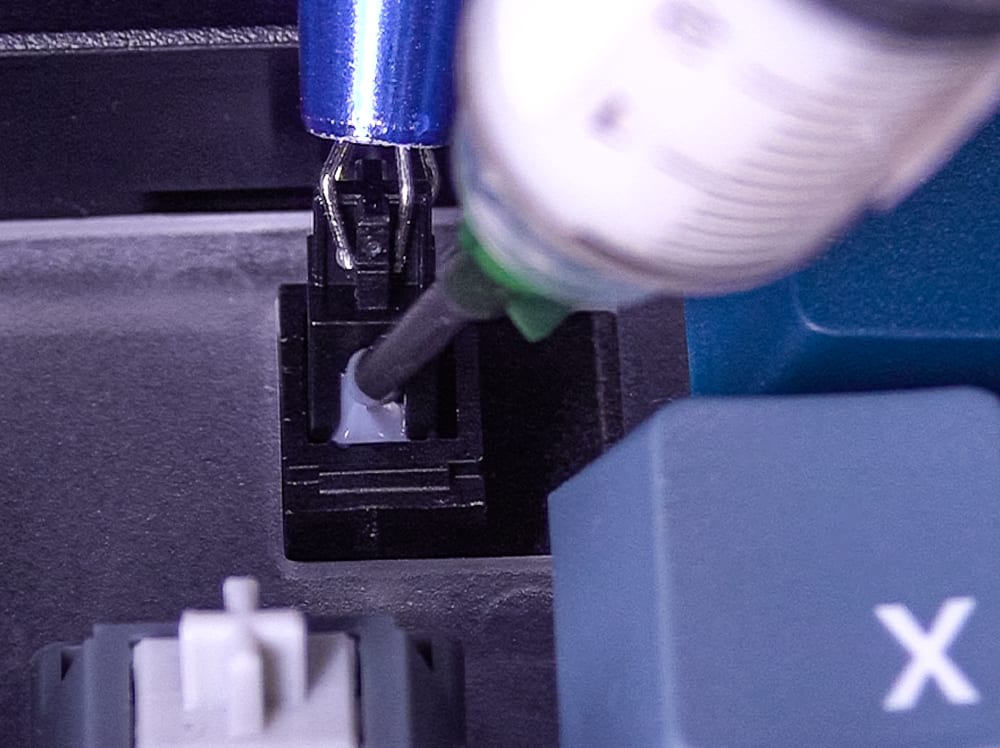
Applying Stabilizer Lube With Syringe
Once the syringe is inside the stabilizer, gently press the plunger to dispense lubricant into the stabilizer. Repeat this for the stabilizer housing as well, and use the tip to move the lubricant around the base of the stabilizer, but be careful not to apply too much lube to the base as this could make its way below the stabilizer stem and cause a sticky stabilizer.
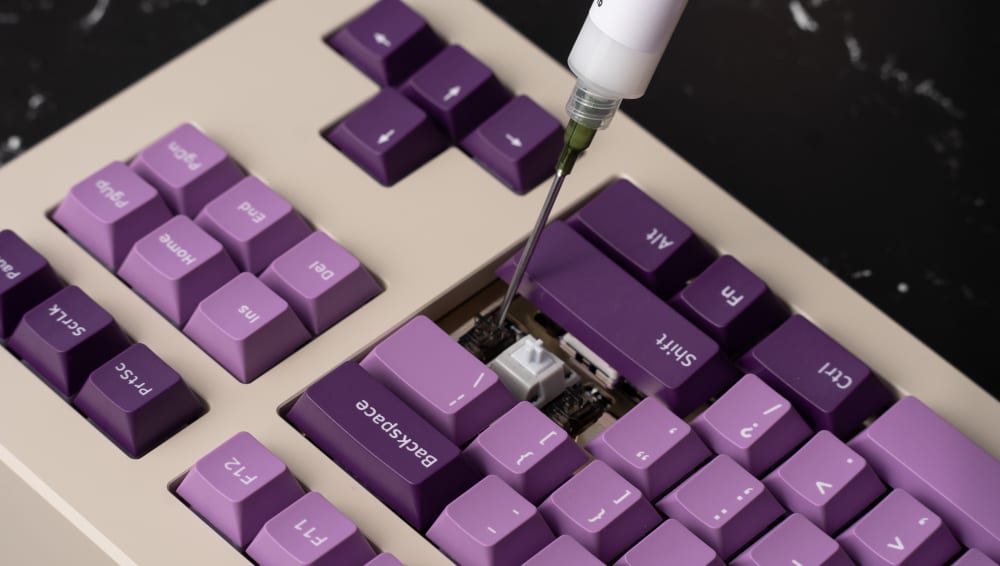
Lubing Stabilizer with Syringe
Repeat these steps for each stabilizer, and you will notice the rattle will be eliminated! If you are still noticing rattle after applying lubricant, it may be that the noise is coming from elsewhere, such as your switches or keycaps.
It's important to note that your stabilizers will probably not be 100% silent, and that's expected, as long as the majority of the rattle is eliminated and not noticable during normal use.
How to Configure With VIA
The TG67 works with VIA out of the box, but depending on the VIA version and the date you purchased your TG67, you may need to upload a JSON file to VIA for it to recognize your keyboard.
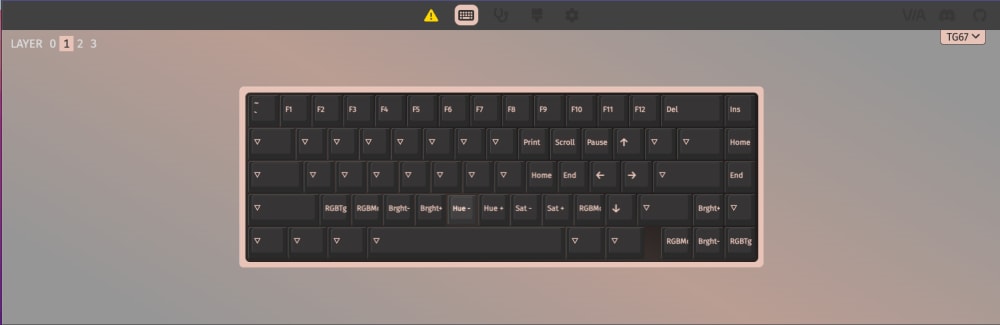
To know if VIA auto-detects the TG67, first, navigate to the VIA configurator's, click "Authorize Device," grant it access to your keyboard, and if you notice that the tool recognizes your keyboard as shown below, then you are all set:
Recognized Layer 0 Layout on VIA
If you don't see the keyboard layout after granting access, you first need to download the TG67 V3 VIA JSON file. Once you've downloaded the file, you need to go to the settings tab in VIA and enable the Design Tab as shown below:
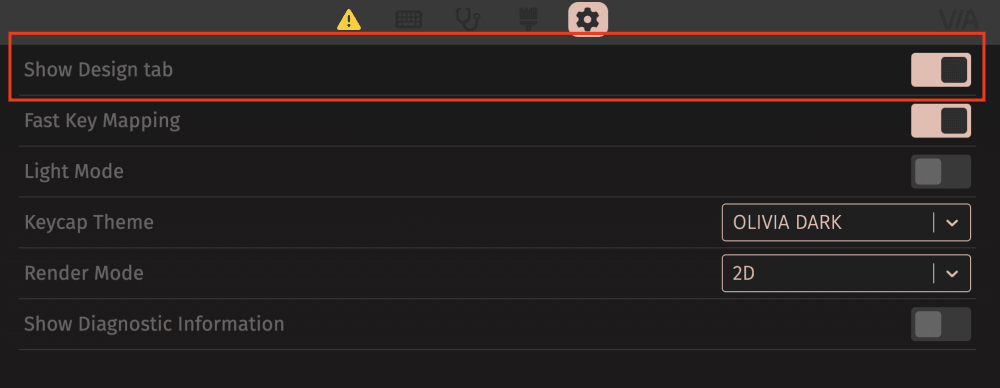
Design Tab in VIA
Then, navigate to the new tab next to the gear icon (with the brush icon), click "Load" to upload the JSON file downloaded previously, and select the "Use V2 definitions" option.
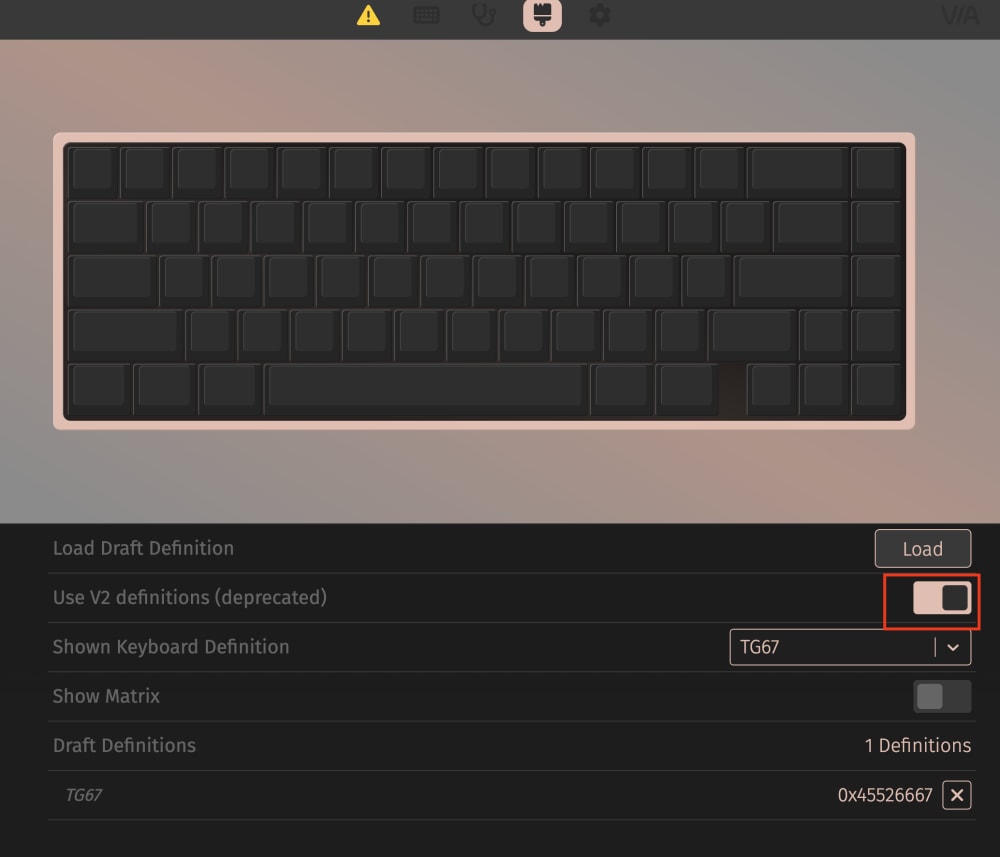
VIA Design Tab
Now, you'll see your TG67 recognized by VIA! Any mappings you make with VIA will be saved on your keyboard, and you won't need to re-configure them if you plug them into a different computer.
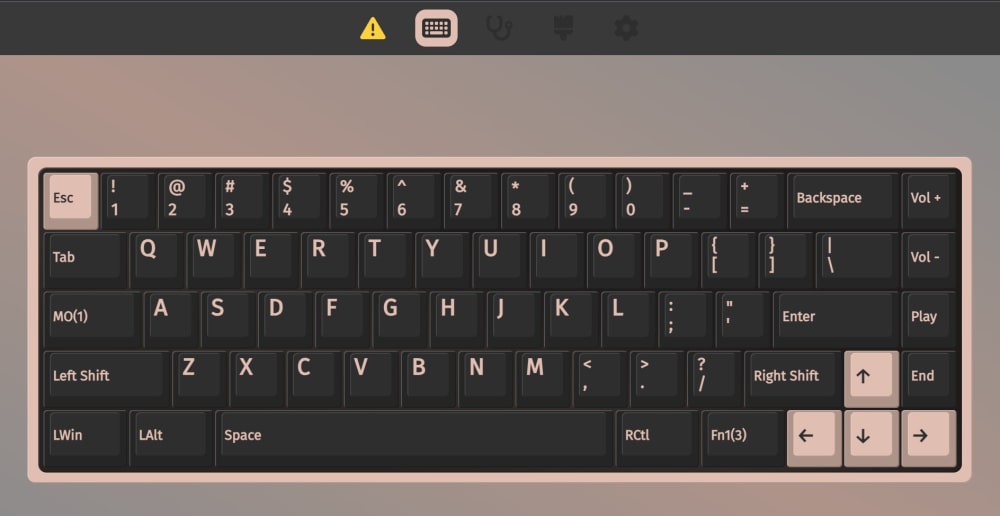
How to Configure RGB
The following keys are configured to control your RGB (these can be re-mapped using VIA, as shown in the steps in the previous section). The function key, by default, is the key two spaces to the right of the spacebar.
- FN + Z to turn the RGB on and off
- FN + X to cycle between RGB modes
- FN + C to decrease the brightness
- FN + V to increase the brightness
- FN + B to decrease the hue
- FN + N to increase the hue
- FN + M to decrease the saturation
- FN + < to increase the saturation
Layer 1 Functions on VIA
Sound Tests and Build Ideas
We've assembled hundreds of TG67 keyboards in various configurations! We're going through many of the ones we've built and taking sound tests of each build, which we periodically add to the Kinetic Labs YouTube channel.
Below are some of the most popular configurations:
Questions & Support
Keyboards can be confusing, especially if this is your first build. Our customer support team is not just here to resolve issues but to guide you through the purchasing and building stages. Please contact us, and we'll help you build your dream mechanical keyboard!