Adeana
Dec 29, 2022
•8 minutes
Lubing Linear Keyboard Switches
Lubing your mechanical keyboard switches is important to smoothen and improve their sound. In this post, we give you specific tips on lubing linear switches.
Lubing Linear Switches
Lubing your mechanical switches is one of the most pleasant modifications you can do to customize the feel, sound, and overall experience of your mechanical keyboard. Nowadays you can buy factory pre-lubed mechanical switches but most switches, some strong staples in the industry, will be available stock or dry—they need lubed.
I would like to share with you my method for lubing linear mechanical switches so you can get ideas for how you could lube your own. This is the technique I use for my personal linear switches and for commissions.
My way is certainly not the only way, it’s a starting point and a look into my technique for you to find what works for you. You can find other guides and tutorials on how keyboard builders like to lube their mechanical linear switches which I encourage you to have a look at.
Let’s get into the tools I like to use, my mindset and my process for lubing linear mechanical switches.
Lubing Tools
Starting out, I did not have all the tools I use now. I did pay attention to what a lot of creators prefer to use in streams, in videos, mentioned in blog posts. I tried a few things, loved them—or not, and settled on these tools:
- A 2-in-1 switch opener.
- The Gateron "Nutcracker" switch opener.
- 4x containers for switch parts—I sometimes use glass candle jars or Kinetic Labs switch containers.
- Krytox 205g0 switch lube.
- A flat 9mm brush—specifically the Army Painter Wargamer: Small Drybrush. You can easily substitute it for a 0 size brush.
- A lube palette.
- Vertrel XF Solvent—A Krytox solvent to clean my brushes.
- Krytox 105 oil.
- A small plastic container for lubing springs.
- A stem holder.
- 2x ceramic precision tweezers.
- A lube station—specifically the Monstargear lube station. Kinetic Labs also has a good lube station from Kelowna.
- Switch films if my switches need them.
- Springs if I am swapping them.
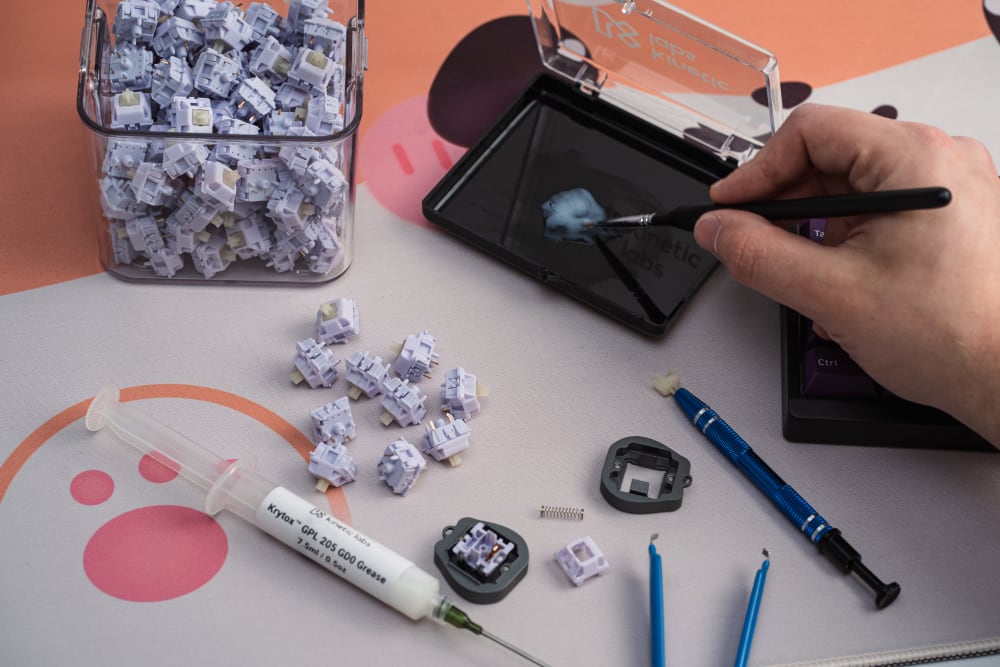
Switch Lubing Tools
These tools are not all necessary, and you can substitute them for what you enjoy quite easily. What is important is to respect safety around lubricants—wash your hands, don’t touch your eyes, don’t put any in your mouth. And that you maintain your brushes so the bristles keep their integrity.
My Mindset for Lubing Switches:
When I set out to become proficient at lubing linear mechanical switches, I quickly found out that it’s a rather slow and precise process, with repetitive actions that you can only become good at by practicing. Just like for soldering, I then set out to do it a lot!
In my opinion, lubing switches is about being consistent. A good lubing job is a consistent and even lubing job. It’s up to you to decide how much lubricant you like in your switches. I found out, by trying a few mechanical switches with different amounts of lube, that I like a medium coat of lube but I like it all around the switch.
Spreading Lube into Brush
Another thing I discovered is that I like the sound of Krytox 205G0. Your ear is your own, so don’t hesitate to try different lubes, like Carbon GS2, to find out what you like. To me, Krytox 205G0 has a deep sound with a well rounded clack as long as you don’t use too much of it—it can mute switches very quickly.
Other than using Krytox 205g0, I am in the habit of always testing my switches dry before I open them to check for three things: housing wobble, leaf ping, and spring scratch. This is how I determine if I need switch films, how heavy-handed I need to be lubing the copper leaves in my switches, and if the springs in the switches need to be swapped.
My Lubing Technique
At this point I have checked a sample of my switches (at least ten) and I have all my tools ready, including films and springs. I always start by pouring all my switches in a switch container. Then I open them all, reserving the bottom housings, stems, and top housings in their individual switch container. I save the original springs in my “bag lubing” container if I’m using them, if not I’ll save the springs in a tiny baggy—I save all my plastic bags to reuse them, I even have a bag of bags. If I am spring swapping, I’ll then count the right amount of the new springs and put them in my “bag lubing” container instead.
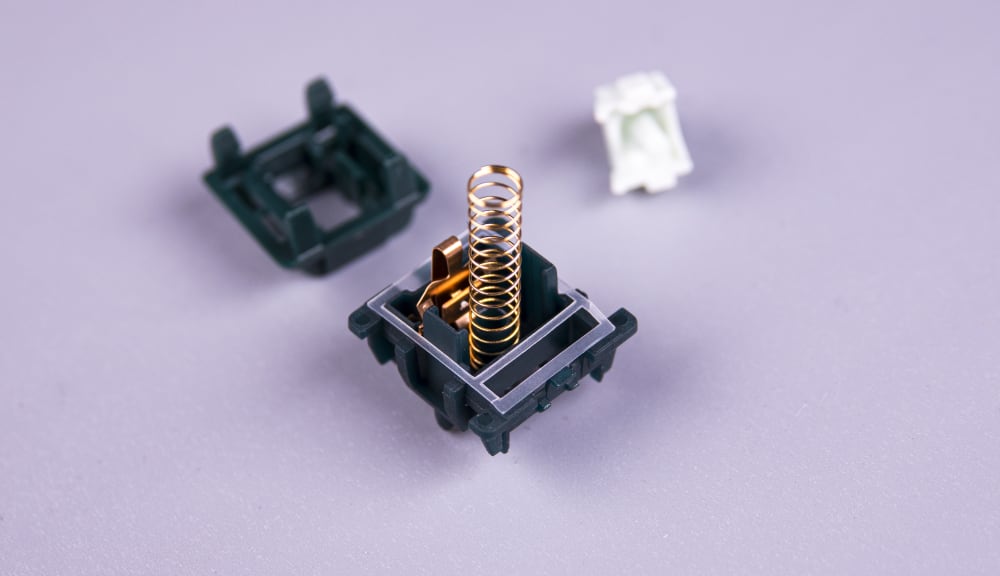
Symmetric Long Switch Spring
You can read more about “bag lubing” switch springs in this post.
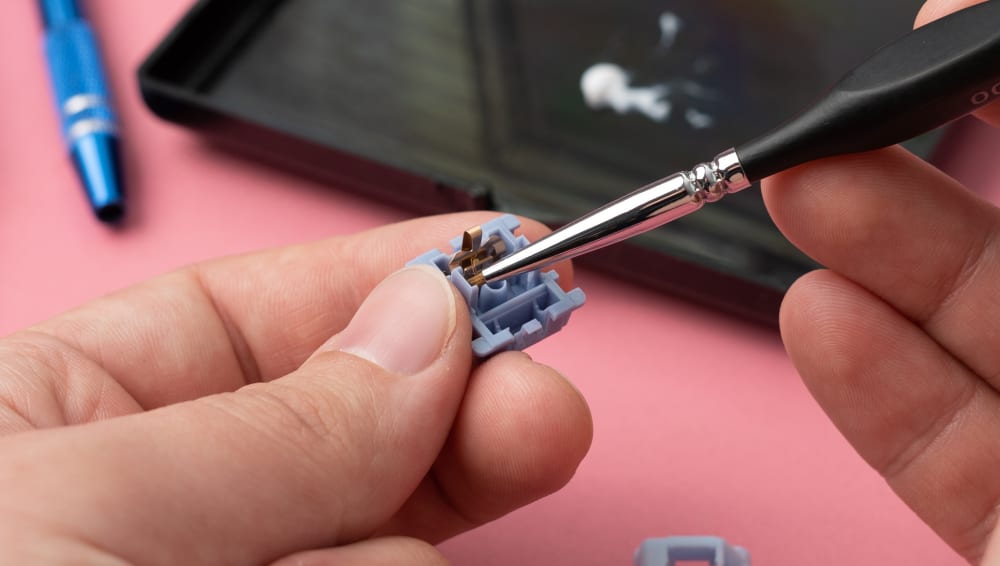
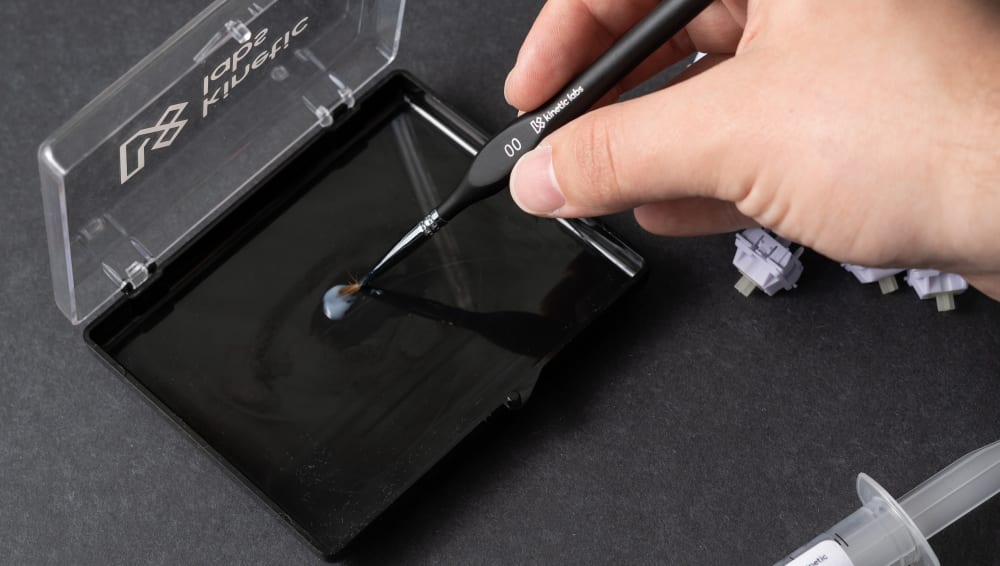
I like to spread Krytox 205g0 on a lube palette and use my brush to make sure it’s well mixed. I start with the bottom housings and I usually do it with a single dip of the brush in the lube. I make sure that there’s a good coating of lube on each side of my brush but not so much that you can see a lot of whiteness on the brush. If you are using a size 0 brush, you will want to have a dollop of white Krytox on your brush.
With lube on my brush, I start with each rail on each side of the switch bottom housing. One rail per side of my flat brush. I make sure to paint the rail bottom to top a couple times so there is a sheen of lube the entire length and width of the rail. I repeat the process on the second rail with the opposite side of my brush. If you are using a size 0 brush, you will want to dab each rail with an equal amount of lube before you paint them. Then I move on to the leaf, painting it from side to side just enough that the leaf shines, there shouldn’t be any white. I flip my brush on the other side and give a swirl of lube around the center column. The urban wisdom out there is that you should avoid painting the inside of the center hole. I also heard that you should paint the inside of the hole but not the outside of the column. In my experience, and with my method, neither is bad, as long as you don’t over do it.
Lubing Linear Switch Housing
There will be more lube on the rails than on the other parts of the bottom housing and that is what I am looking for. I place my bottom housings on my lube station as I go.
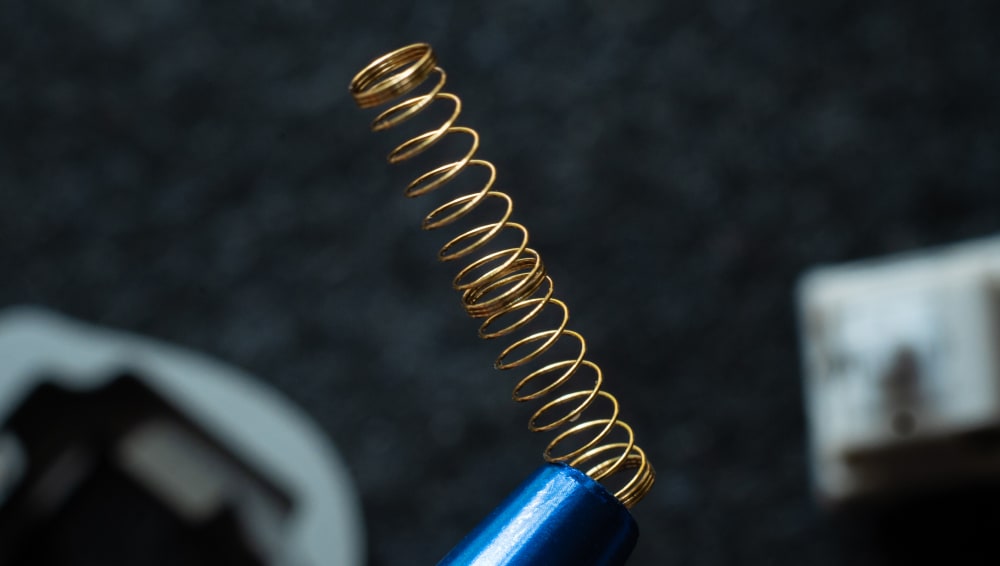
If I’m using them, it’s time to install my films on all my bottom housings. And when that is done, I add a few drops of Krytox GPL 105 oil to my “bag lubing” spring container and shake for a good minute or two. I reuse the container every time I lube switches, so there will be Krytox GPL 105 oil in my container already—you don’t need a lot of oil, just a lot of shaking. Just like for the copper leaf in the bottom housings, your springs should only have a shine from a thin coat of lube.
Hot Tip: to know if you need films, check your switches for housing wobble. Set your switch on your switch opener or clip it in your lube station, grab the top housing between your fingertips and try to move it from side to side in both directions. If you can feel movement and/or hear creaking, you might need a switch film—they range from thin to thick in mm. Note that by opening your mechanical switches, you will introduce housing wobble, so try to keep opening them to a minimum.
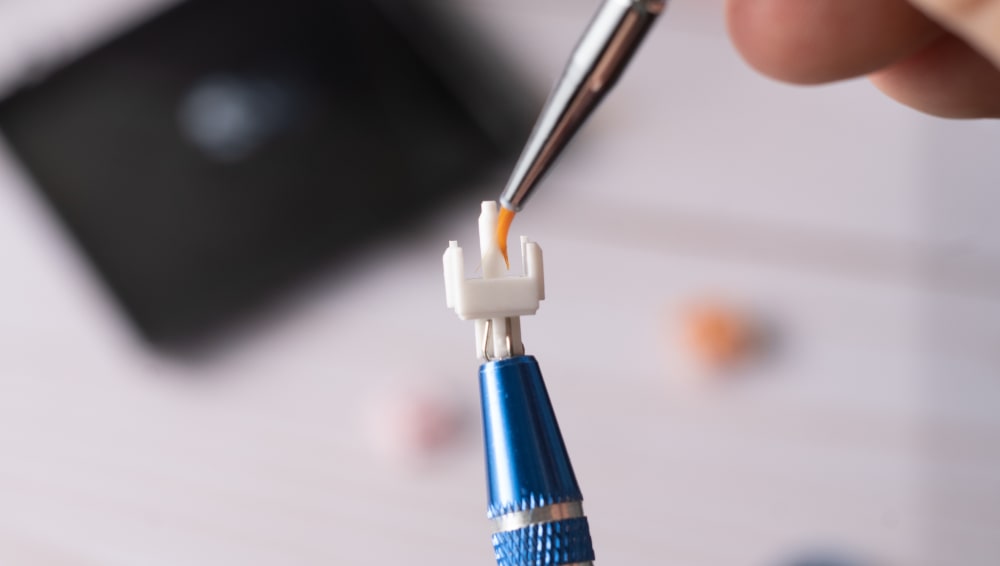
Durock Switch Film
With my tweezers, and without wiping them, I install my springs on the center column of each bottom housing. Then I move on to the stems.
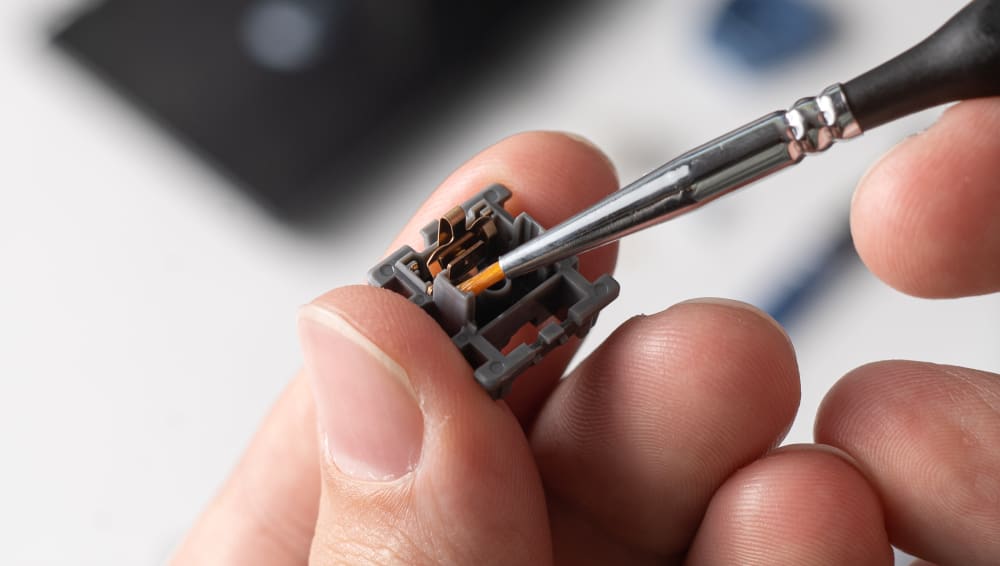
For stems, I’m back to Krytox 205G0. I use my stem holder to prop the stem and then just like for the bottom housing, I only dab my brush in lube once coating both sides. Then I paint two sides of the stem with one side of my brush, then flip it and paint the remaining two sides—if you’re using a size 0 brush, dip it in lube again after you’ve painted two sides of the stem. All four faces of the stem are coated with an equal and even application of lube, including the bottom of the two sliders and the two front legs. I finish with a swirl around the stem pole before I place my stem on the center column of my bottom housing.
Lubing Switch Stem
Once all the stems are set down in the bottom housings on my lube station, I get my top housings, and lining one up with a bottom housing—being careful that films don’t move around—I close my switches. Eventually, every switch returns to the switch container it came in. If you don’t have a lube station, or a smaller one, or you like to lube your switches in several installments, you can lube your switches one by one or repeat the process as needed.
And there you have it, that is how I like to lube my linear mechanical switches. I hope this was helpful and that my method gives you ideas on how to lube your own, or maybe the motivation to try.