Catherine L.
Oct 1, 2022
•12 minutes
The Ultimate Guide on Lubing Keyboard Switches
You’ve picked out switches for your mechanical keyboard, so it’s time to decide if and how to lube those switches: here's the ultimate guide for lubing switches.
Lubing Mechanical Keyboard Switches
Mechanical keyboard fanatics know that lubing switches gives keyboards a smoother feel. They also know that applying lubricants to switches can reduce background noise. Proper lubing lets switches gloss over imperfections, making for a more responsive keyboard. Since most manufacturers do not pre-lube switches, it's only a matter of time before you'll need to do it yourself.
Lubing switches does take time, and the process may seem overwhelming. There are a lot of switches on a mechanical keyboard! However, our guide to lubing your mechanical keyboard switches breaks down the process into seven steps, making it easy to lube switches yourself.
Tools for Lubing Mechanical Switches
In addition to the following tools, you will need a clear workspace that can hold keycaps and switch parts.
- Switch Lube Brush. Use to apply lubricant.
- Switch Opener. Opens each switch.
- Switch Puller. Removes the switch from the keyboard.
- Keycap Puller. Lifts the keycaps from the keyboard.
- Tweezers. Grab small switch parts.
With tools in hand, you need to pick the switch lube for your project.
Switch Lubes
Picking a switch lube depends on the viscosity of the lubricant. Viscosity is how free-flowing a substance is. For example, water has a low viscosity because it pours quickly. Molasses has a higher viscosity because it pours much slower. For a lubricant to work on switches, it needs enough viscosity to remain on the switch parts.

Various Switch Lubricants
The viscosity varies based on the switch type.
- Tactile switches produce a sound when pressed but with little noise. These switches use a lower viscosity lube such as Tribosys 3203 or Carbon GS1 to prevent losing tactility.
- Linear switches tend to produce relatively little sound without a tactile bump. Krytox 205g0 is the most used switch lube because of its consistency and viscosity.
- Clicky switches are designed to be noisy. Krytox 105 is a low viscosity lube for clicky switches.
Clicky switches are designed to make noise. Be careful when lubing, so the switch does not lose its click.
Switch Parts
Knowing the parts of a switch makes it easier to put them back together. By understanding what each part does, it's simple to reassemble a switch. If you need help, it's easier to explain your difficulty.
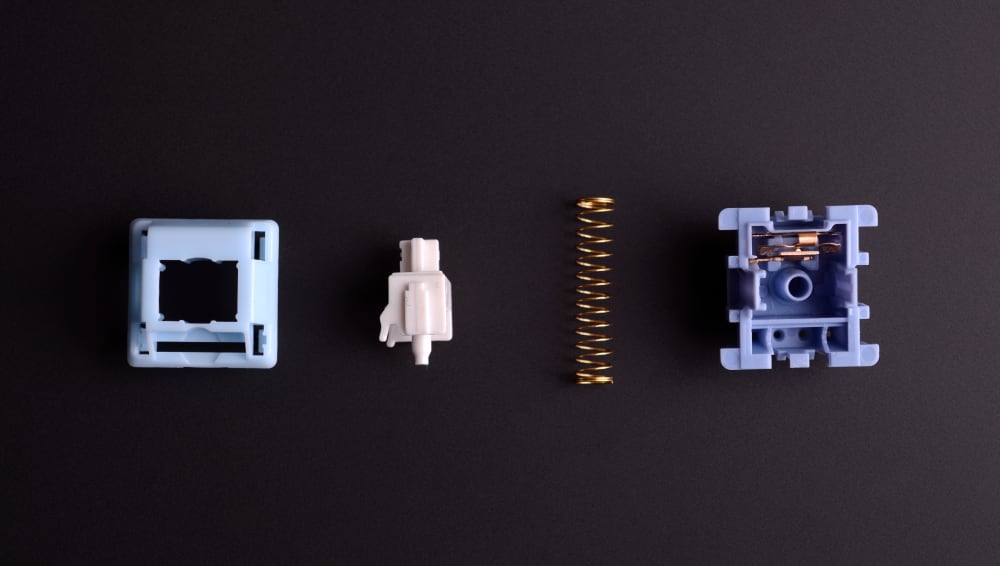
Penguin Tactile Switch Parts
- Upper Housing. The upper housing covers the switch and holds the pieces together.
- Stem. The stem connects the keycap to the crosspoint contact, which lets the computer know which key was pressed. It is also the piece that separates linear and tactile switches from clicky switches.
- Crosspoint Contact. Most people refer to these contacts as leaves. When the stem comes in contact with the leaves, the crosspoint contacts generate an electrical signal that allows the computer to register a keystroke.
- Coil Spring. The coil spring regulates the force required to register a keystroke. It determines how much pressure must be applied to a key. Linear switches would have a looser coil than a tactile switch.
- Bottom Housing. The bottom housing holds all the components of the key switch together while providing a passthrough for the electrical impulses.
How to Lube Your Switches
Before starting the process, make sure you have the tools and lubricants needed. If possible, have a large enough space to set the keycaps down rather than stack them. You will also need a space to set the switch parts.
1. Remove Keycaps

Kailh Keycap Puller
Using a keycap puller remove the keycaps from the keyboard, keeping them in order. You may want to take a picture of the keyboard before you begin for reference.
2. Remove the Switches
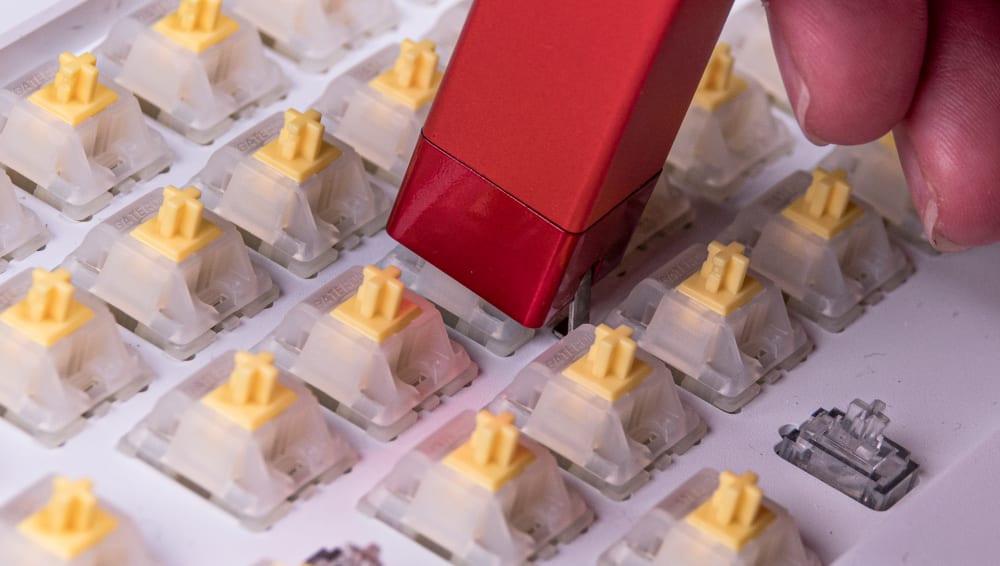
Gateron Switch Puller
Use a switch puller to lift the switch from the keyboard.
3. Disassemble the Switch
Gateron Switch Opener
Switch openers make taking a switch apart much faster once you get the hang of it.
- Set the switch right-side-up on the opener, aligning the tabs.
- Push down on the stem and upper housing. The pressure should cause the switch to open.
- Pull the upper housing off, being careful not to damage the legs.
- Separate the stem, the spring, and the bottom housing into separate containers.
Repeat the process until all switches have been dismantled.
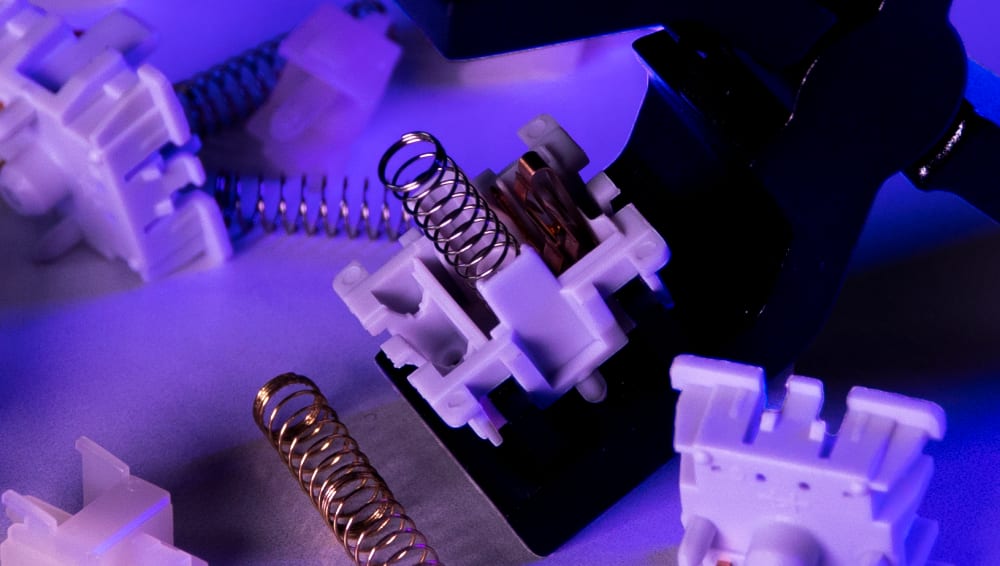
4. Lube the Spring Coils

Switch Spring
Rather than lubricate each spring coil, you can use a batch method if you are doing a large number of coils.
- Find a small plastic bag.
- Add the springs.
- Add 20-30 drops of oil.
- Close the bag, leaving some air inside.
- Shake the springs for a minute.
- Open the bag.
- Separate any coils that are stuck together.
This method of bag lubing with Krytox 105 oil works for many springs, but if you are lubing a few springs, you can use the following method to lubricate a single spring coil.
- Place a small amount of lubricant on the top of the spring.
- Brush well.
- Place a little lubricant on the bottom of the spring.
- Brush well.
You can add a touch of lube to the middle portion if you feel it is needed. You can use a thick lubricant such as Krytox 205g0 for this purpose.
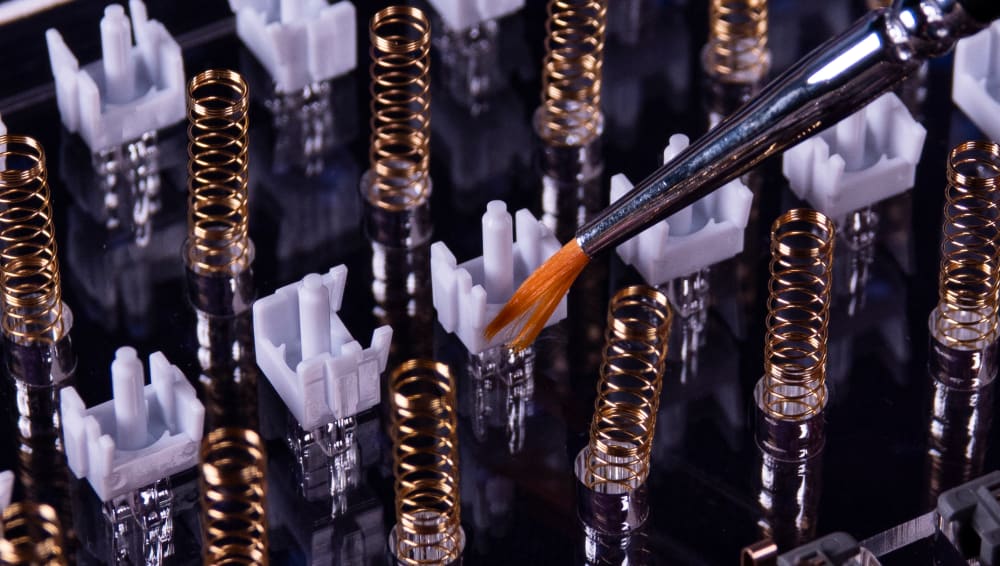
5. Lube the Bottom Housing

Lubing Switch Bottom Housing
With a switch lube brush, dip the tip into the lubricant, making sure to remove the excess. Consider a lube palette as a way to spread the lube evenly.
- Apply the lube to the rails of the bottom housing.
- Add a little lubricant to the corners of the center mast.
- Brush off the corners of the bottom housing.
No white residue should be visible around the edges. Lubricating the leaves is not recommended.
6. Lube the Upper Housing
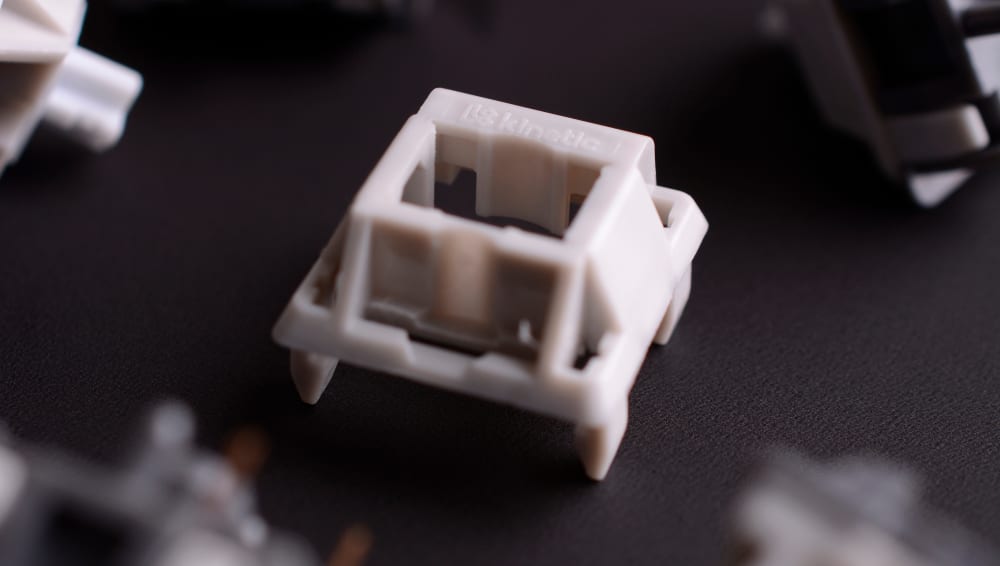
Husky Linear Top Housing
As with the bottom housing, consider a lube palette for distributing the lube evenly on your brush.
- Apply the lube to the housing legs.
- Add lube to the housing nameplates.
- Brush off any excess.
Some experts believe you only need to lube where the stem contacts the upper housing and not the legs.
7. Lube the Stem
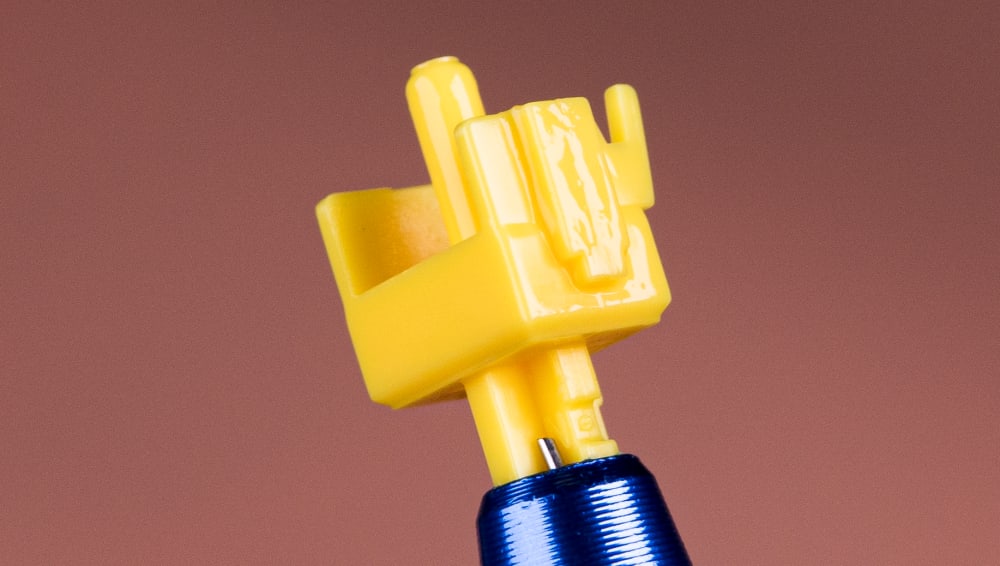
Lubed Gateron Yellow Stem
- Using a stem holder can make lubing the stem go faster.
- Apply a tiny amount of lube to the four sides of the stem.
- Go over the application making sure to even out the lube on all four sides.
- Put a thin coat on the inside of the stem.
You can lube the legs; however, it may lessen the bump of a tactile switch.
After lubing all the parts, you're ready to reassemble the switches and keyboard. As you put the switches back together, be sure to look for any excess lubricant which can interfere with the contacts when reinstalled.
How to Reassemble a Switch
Putting a switch back together is reversing the process of taking it apart.
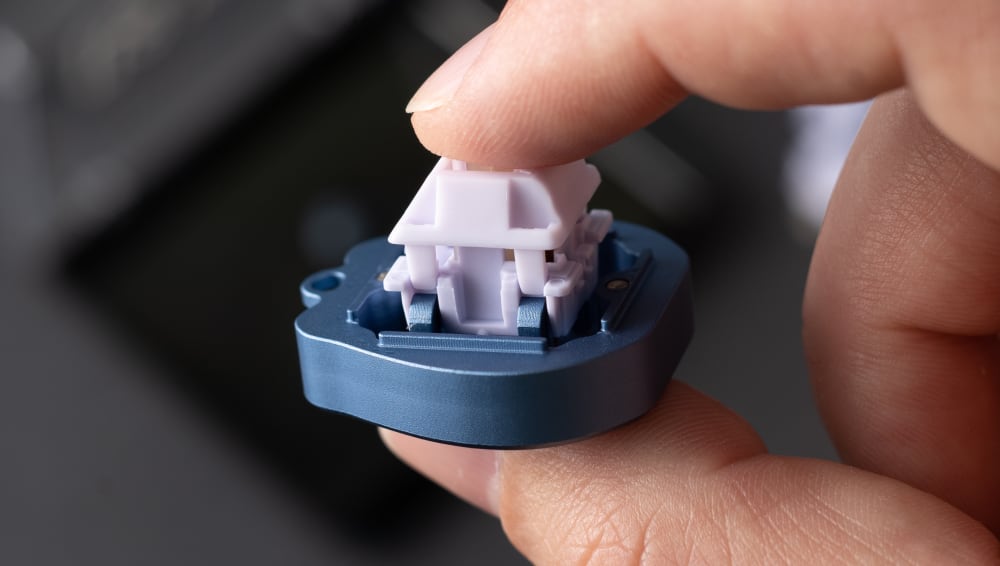
Reassembling Hippo Switch
- Start with the bottom housing.
- Place the stem firmly into the bottom housing.
- Make sure not to bend the crosspoint contacts.
- Put the spring back in its original position.
- Snap-on the upper housing.
You should be able to depress the stem if the switch is reassembled correctly. If not, reassemble the switch making sure the parts are properly aligned. Then, return the switch to the correct location on the keyboard. Place the keycap on top of the housing. Now you are ready to test your keyboards.
How to Test Your Keyboard
Once your keyboard is back together, load your favorite key tester software to make sure everything is working as intended. If keys are unresponsive or they lack that tactile bump, you've probably applied too much lube. Check the lube on the stem legs and contacts if the keys are not as tactile as before. For unresponsive keys, check for excess lube on the specific switches.

Via Configurator
If the keyboard feels rough or scratching, you may have missed an area when lubing. You'll need to re-open the switch. Then, re-apply the lube, making sure to touch the stem and spring.
If your keyboard fails to register a keypress, you have several options:
- Replace the existing switch with one that works. If the new switch works, the lubed switch is faulty.
- Make sure the pins on the switch are straight, and retry the switch.
- Check if the crosspoint contact leaves are lubed. If so, wipe off the leaves with isopropyl alcohol and try again.
Although rare, a lubed switch may be faulty and need to be replaced.
Lubing Your Mechanical Keyboard Switches
With the right tools and guidance, you can lube your mechanical keyboard switches in no time. The range of tools offered by Kinetic Labs includes magnifying glasses for less eye strain and containers for separating linear switches from tactile. Not only will you have a better functioning keyboard, but you will have the satisfaction of a job well done.

Magnifying Glasses
To learn more about our ear-soothing switches, eye-popping keycaps, or jaw-dropping desk mats, get in touch with us. We're always happy to answer any questions!
FAQs
- Do you need to lube your keyboard switches?
- No, you don't need to lube your switches, but it's recommended. Most manufacturers do not pre-lube their switches which increases the odds of more noise and rougher keystrokes.
- What kind of keyboard switch lube should you use?
- The type of switch lube depends on the switch. Clicky switches may not require any lube, or if they do, it has a low viscosity. Tactile and linear switches require switch lubes with a higher viscosity.
- Why should you lube your keyboard switches?
- Lubing your mechanical keyboard switches can: reduce tactile bump, minimize scratchiness or rattle, improve acoustics, smooth actuation. For some people, the lubing process is strangely therapeutic. It can also extend the life of your keyboard.