Preston S.
May 8, 2023
•4 minutes
How to Properly Silence Your Keyboard Stabilizers
Tuning your stabilizers can be daunting and in this short guide you will learn everything you need to properly and easily modify and fine-tune your stabilizers.
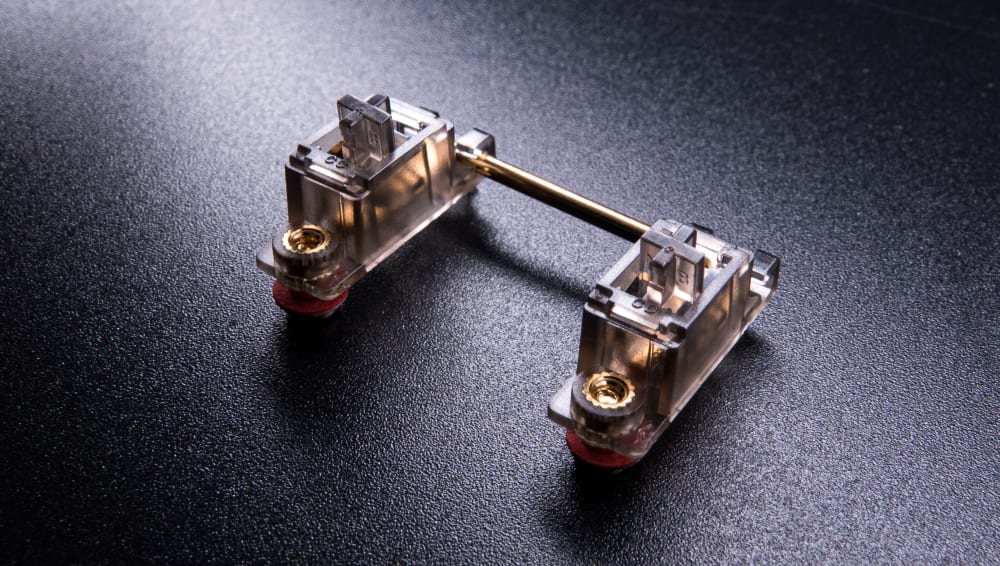
Gateron Ink V2 Stabilizers on black desk
Tuning your stabilizers to make them quieter and remove rattle can be quite a draining task, and can take a while to do, so that's why today I will be going over all my tips on how to tune your stabilizers properly.
Before we get started we are going to need to following tools and items. Now some of these are not needed, but will be used for more advanced modding if you still can’t remove the rattle.
- 1. Flush cutters
- 2. Krytox 205g0 & Dielectric Grease
- 3. Small Paint Brush
- 4. Adhesive bandage(for Holee mod)
- 5. Scissors and Tweezers for Holee mod
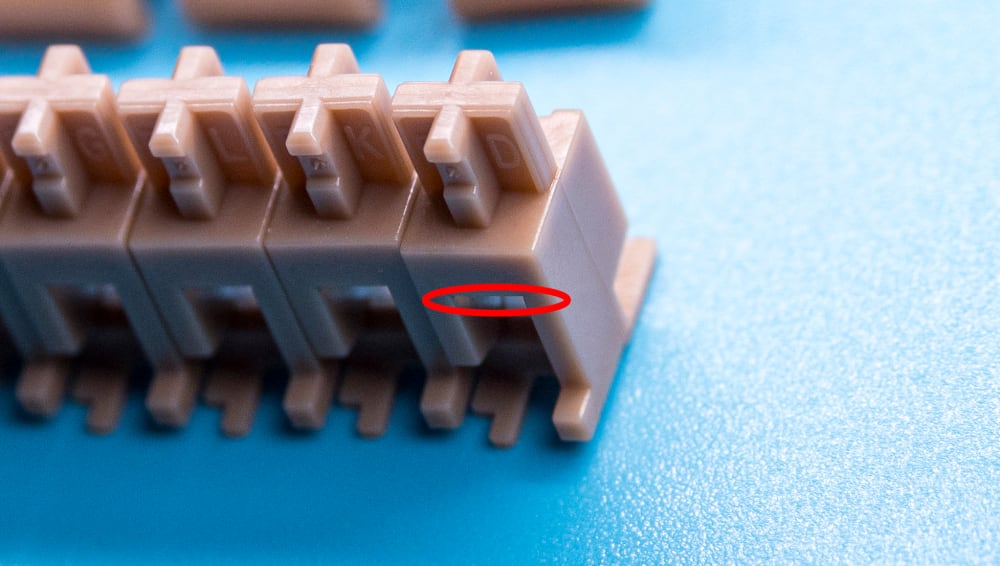
Now that we have gone over all of the required materials, let's start off with one of the easiest mods to do, and that is to clip your stabilizer stems. These get in the way of creating a better feeling bottom-out experience and can make your stabilizers feel a bit mushy as a result. Nowadays a lot of stabilizers already have them pre-cut so if that is the case you can skip this step.
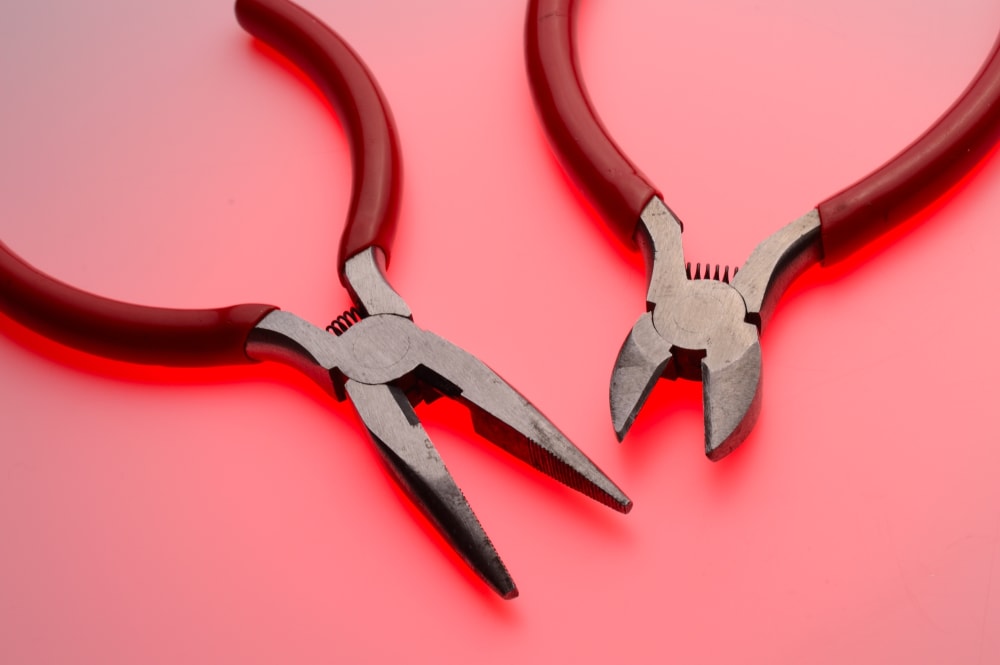
Wire Cutters for Clipping Stems
To perform this mod all you have to do is grab your flush cutters (if you don’t have flush cutters you can always use something like nail clippers, but flush cutters are recommended). You are ONLY going to cut the two legs that protrude from the stem, and not the ones that are already flat. See the image below.
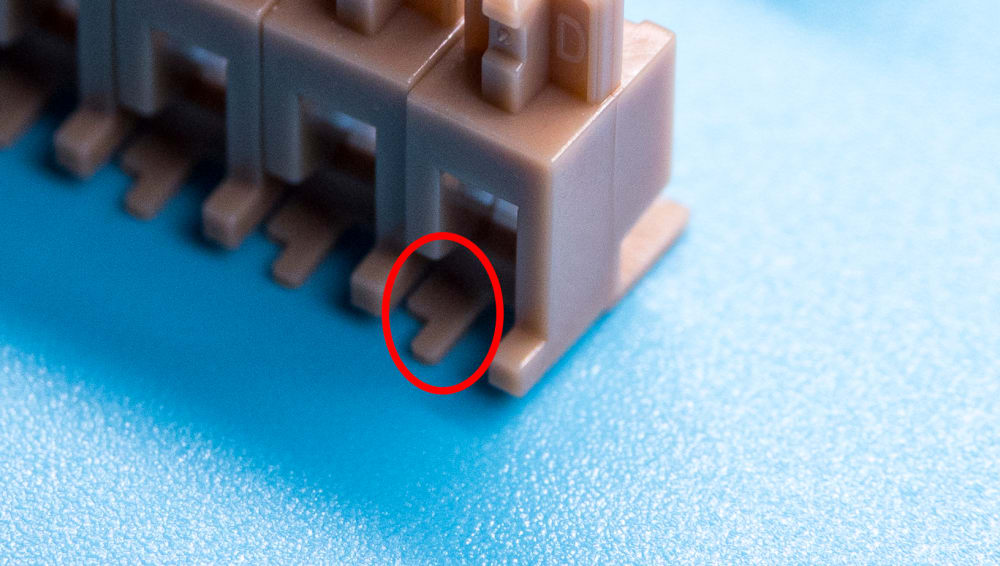
Stabilizer Stem Leg to Clip
After this, just repeat the process until you are done with all of the stabilizer stems you are going to be using. Once you have finished this step, you can move on to balancing your stabilizer wires. To do this lay them on a flat surface, hold down one side of the stabilizer with two fingers, and tap the other side to see if it has any ticking to it, if it does, you want to bend that side a little bit and repeat the process until the ticking is completely removed from each side. Just make sure the surface you are working on isn’t glass as you can break it with the force you are putting. You can also use two syringes for this step if you don’t have a flat surface to work with or use a dedicated stabilizer twister set for a better experience.
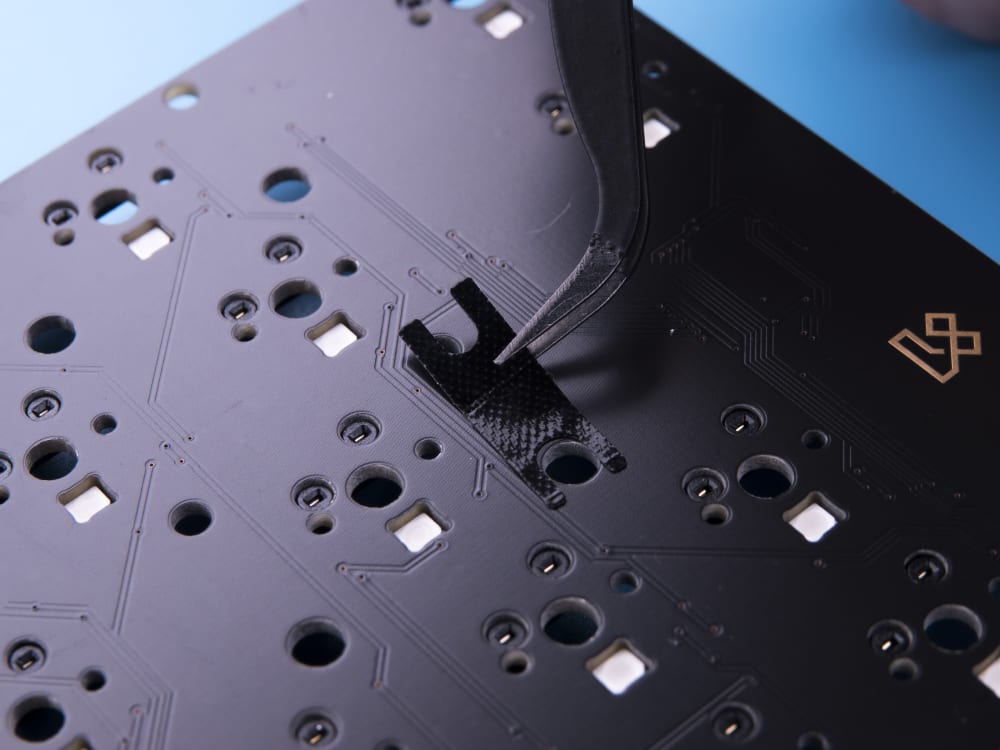
This next step is optional as it can be quite annoying to do, but is recommended if you know that the stabilizers you are working with are not good. We are going to be performing what is known as the “Holee mod”. This is best done BEFORE you lube your stabilizers as the lube can make the band-aids not stick as well to the stabilizer stem. You are going to want to cut off a little piece of the band-aid that is around the size of the hole in the stabilizer stem. Sometimes getting it the right size can take a couple of tries, but having it too small or too big could make the stabilizer feel worse.
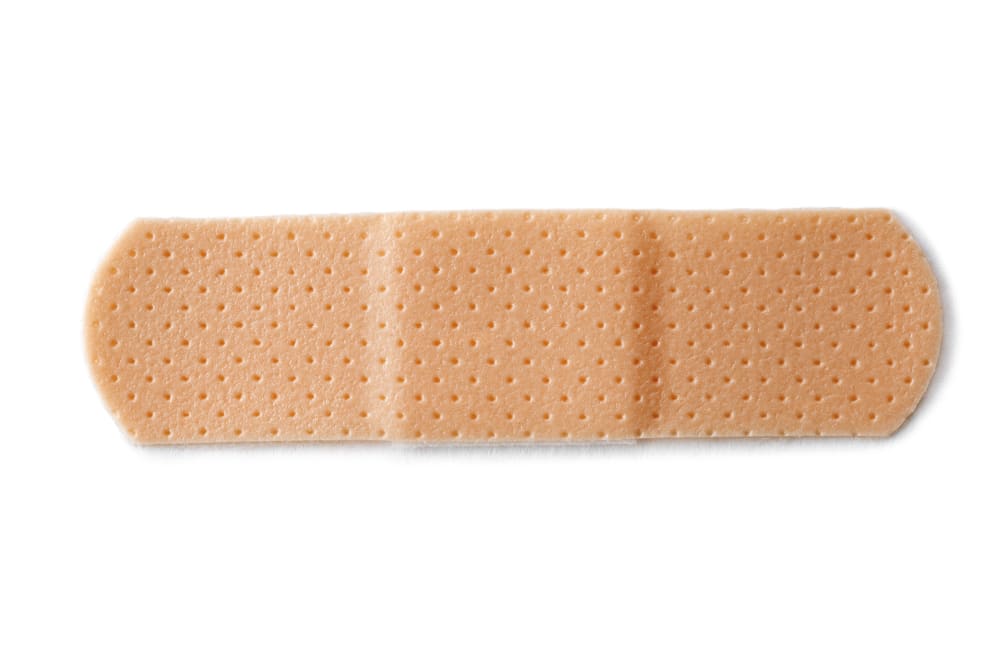
A Standard Bandaid for Bandaid Mod
The next step is to place the band-aid into the stem. To do this all you have to do is flip the stabilizer stem upside down and use a pair of tweezers to slide the bandaid into the angled hole. Once that is done, you are going to wrap the band-aid and make it so it goes into the smaller hole in the stabilizer stem. If you have any excess band-aid sticking out, feel free to cut it. This part is pretty hard to understand via text, so I have provided a picture below of the process. Just make sure that both holes in your stabilizer stem have the band-aid attached to them.
Where to Insert Bandaid
After this step we can move on to lubing your stabilizers. To do this grab your paintbrush and put some Krytox 205g0 on it. You are going to lube both sides of the stem and apply lube to the inside of the stabilizer housing as well. Once this is done, you can apply dielectric grease or Krytox 205g0, but I have found that dielectric grease works better for stabilizer wires, by dipping the wire into the lube. Make sure you apply lube on the angled part of the wire that attaches to the stabilizer housing as well. You can be more generous when lubing stabilizers, but be careful not to overdo it as that can make them feel mushy.
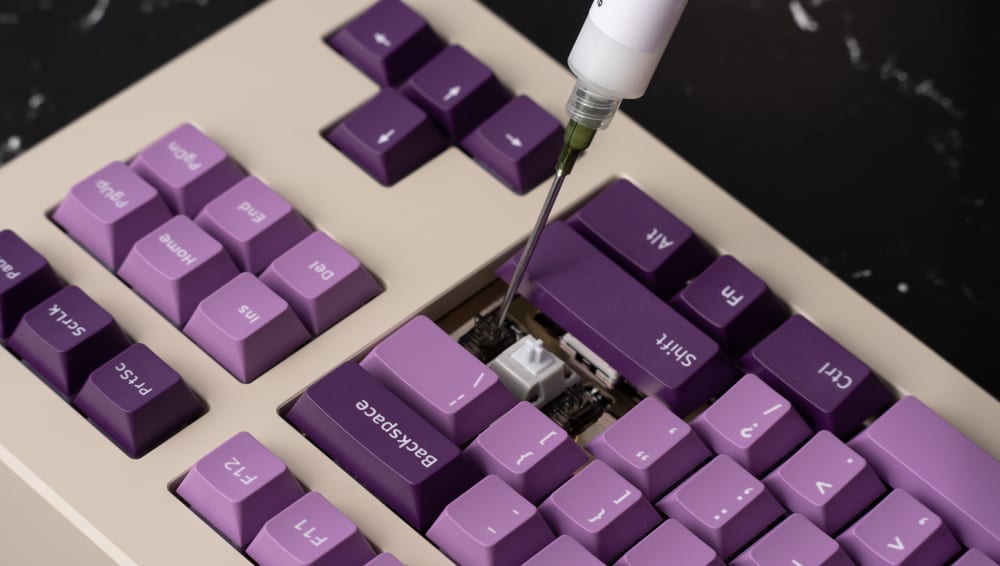
Lubing Stabilizers with a 205g0 Syringe
After you are done with all of the steps above, you can begin to reassemble your stabilizers. Now if you are using plate-mounted stabilizers, you might run into another issue where the stabilizers don’t fit as snugly as they should in the plate causing them to rattle. To fix this issue, all you have to do is cut some strips of Band-Aid and apply them to the part of the plate where the stabilizer clips onto. This should help fix that issue entirely. Alternatively, you can use pre-cut stabilizer foam stickers to do the same.
Stabilizer Foam Sticker
Sometimes the stabilizer stem doesn’t properly fit into your keycap and can cause it to wobble as a result. When this happens, you can use a small piece of cling wrap to help fill in the gaps of the keycap that the stabilizer was having trouble filling without creating a super tight fit.
Now if you have done all of this and are STILL having issues with the stabilizer, sometimes it can actually be the switches that are making the noise. Try swapping out your switches for different ones, and seeing if that makes a difference. If it does, but you really want to use the other switches, you can apply a small amount of Krytox 205g0 to the back of the switch leaf, and that usually will remove the leaf ping noise you hear when you are typing. This issue is fairly common on tactile switches, so if you are using tactiles and have this problem, just make sure not to lube the front of the leaf as that can make the switch lose some of its tactility.
Gateron Ink V2 Stabilizers
Overall there are a lot of areas where your stabilizer can have some issues, but there are also a lot of different ways to get rid of those issues as well and I hope this article helped serve as a guide to fixing all of your stabilizer problems.